Friday, June 29, 2012

Spicy Pasta with Olive Oil & Sun-dried Tomatos


I am officially in love with sun dried tomatoes. Since I first started eating them, I am trying to find any excuse to put them in the things I make. I believe there are two out of the other eight recipes I have in backstock that have sun dried tomatoes. Don't even know what it is about them that I love so much, but I want them in everything! 
This pasta was full of great flavor. With a little bit of spice and saltiness from the cheese. You really want to try and save some of the water every time you make a sauce with an oil base. The starchiness from the pasta infuses the water, giving your sauce a thicker consistency. I love seeing the difference after you add the water. You can really tell!

Sorry for the lack of pictures this time, but it's really simple I promise!


Spicy Pasta with Olive Oil & Sun-dried Tomatoes


Ingredients:
1 package of spaghetti, whole grain/fiber (any healthy kind of pasta)
2 cloves of garlic, minced
4 tablespoons extra virgin olive oil
14 cup sun-dried tomatos, in oil
1 tablespoon red pepper flakes, more or less to taste
1/4 cup parmesan, plus a little more for garnish
salt and pepper to taste

Directions:
  1. Cook pasta according to directions, a little less than al dente. Drain pasta, saving 1/2 cup pasta water. Do not drain pasta with water, you will lose the starchiness that allows the sauce to stick. 
  2. In same pot, add olive oil and garlic. Cook 1 minute until garlic starts to brown a little, do not burn garlic otherwise it will be bitter. Add sun dried tomatos and red pepper flakes, cook for 1 minute. 
  3. Take off heat; add pasta, cheese, 1/4 cup pasta water (more if desired), and salt and pepper to taste. Toss until combined. 
  4. If desired, top with cheese and bread.
Makes 4 servings.
Nutrition: Calories 515; Fat 22g; Cholesterol 6mg; Carb 76g; Fiber 10g; Protein 14g


Tuesday, June 26, 2012

Grilled Raspberry and Rosemary-Glazed Chicken Drumsticks


Ever since I bought my cast iron grill pan, I have been trying to find reasons to use it. As much as I like grilling outdoors, I want to find as many recipes for indoor grilling as I can. We are in the Pacific Northwest where summer lasts for like two weeks. The char on the drumsticks was a bit more than what I would have liked, but I am still learning how to use my cast iron pan and I turned the heat on a little too high at first. You should have seen my kitchen, it was a little hazy there for a couple minutes. Oh how I love fanning my smoke detector so it doesn't go off. I'm sure everyone has had to do that once or twice right...right?! :)


Grilled Raspberry and Rosemary-Glazed Chicken Drumsticks
Betty Crocker's Healthy New Choices


Ingredients:
1/4 cup seedless raspberry spreadable fruit
1 tablespoon lemon juice
1 tablespoon spicy brown mustard
1/4 tablespoon rosemary, minced
2 pounds chicken drumsticks, skin removed

Directions:
  1. Mix spreadable fruit, lemon juice, mustard, and rosemary; brush on drumsticks. 
  2. Heat cast iron grill pan on medium heat, when hot brush lightly with oil. Grill drumsticks 5-6 minutes per side, 25-30 mins until center reaches 160º with thermometer or until juice of chicken is no longer pink when centers of thickest pieces are cut. Occasionally brush with extra fruit mixture. To make chicken cook faster, and prevent lots of splatter, cover lightly with any kind of pan lid. 
  3. To Broil: Set oven control to broil. Place chicken on broiler pan. Brush with fruit mixture. Broil chicken with tips 7 to 9 inches from heat 20 minutes; turn. Brush with fruit mixture. Broil 10 to 15 minutes longer or until juice of chicken is no longer pink when centers of thickest pieces are cut. 
Makes 4 servings.
Nutrition: (2 drumsticks) Calories 270; Fat 12g; Cholesterol 90mg; Sodium 130mg; Carb 10g; Fiber 0g; Protein 30g

Sunday, June 24, 2012

Pulled Pork Panini


After my day of slow-cooking I found that I had plenty of Pulled Pork left over to feed a family of 10. I then spent the next couple days finding ways to use those left overs. Then I came across this naan bread at the store. All of a sudden I was in the mood for a warm pork panini. This really is a fast recipe, the only time taking part is the caramelization of the onions. Now don't judge me on my onions, it was my first time making them. Perfection comes with practice and I plan on making them again many times! 

The one surprise from this was the bread. It came out of the panini press crunchy on the outside and soft in the middle. A few days later I paired the second bread with a large bowl of pasta, and it was fantastic. I have found recipes for naan bread and I plan on making it very soon! 


Pulled Pork Panini


Ingredients:
1 flatbread, wrap, pita, or naan
1 onion, caramlized
1 tablespoon olive oil
1/2 cup bbq pulled pork
1 -2 tablespoons cheddar cheese

Directions:
  1. Heat a non stick skillet to medium-high heat. Add 1 tablespoon olive oil and onion julienned. Stirring occasionally so onions don't stick, cook until onion is brown and soft; about 20-30 minutes. 
  2. Place pork on 1/2 of bread, layer with cheese and onions. Press in a panini press and cook until heated through. Cut in half.
Serves 2
Nutrition: Calories 413; Fat 19g; Cholesterol 51mg; Carb 41mg; Fiber 5g; Protein 25g

Friday, June 22, 2012

Slow-Cooker Pulled Pork


Along with baking, summer is my favorite time to pull out the crock pot. Putting together all of your ingredients and throwing them in one pot. The rest of the day you can do what ever you please while dinner cooks for you. This time I was craving some pulled pork. The funny thing is that I have never had pull pork. It's odd I know. The house smelled so good all day while the crock pot was on. This recipe is so versatile too. You can make a sandwich like I did, tacos, quesadillas, or even a pizza recipe!  Trust me with this recipe you will have plenty left over for days worth of left overs. So much awesomeness with one ingredient. :)


The little blue thing was one of those timers that pop up when the meat is done. I tried to take it out before cooking but it was stuck!


Slow-Cooker Pulled Pork
adapted from All You magazine Issue May 2007


Ingredients:
1 (3lb) boneless pork shoulder, skin and excess fat removed
1 onion, chopped
1/2 cup low-sodium chicken broth, or water
2 cups bottled or homemade barbecue sauce
2 tablespoons mustard
2 tablespoons honey
1 tablespoon soy sauce
Salt and Pepper

Directions:
  1. Trim pork of any excess fat, season with salt and pepper. Scatter onion over bottom of slow cooker and place pork on top. Add brother, cover and cook on low until very tender, about 8 hours. Removed meat and let cool.
  2. When cool enough to handle, pull meat into thin shreds (use two forks or hands), removing all fat and gristle. Drain liquid from slow cooker, leaving onion. 
  3. Return pulled pork to slow cooker and stir in barbecue sauce, mustard, honey, and soy sauce. Season with salt and pepper. Cook for 1 hour longer on low. If desired, serve with hamburger buns and sides of pinto beans, corn, tomatoes, and coleslaw.
Makes 6 serves.
Nutrition: Calories 584; Fat 24g; Protein 50g; Carb 38g; Fiber 1g; Cholesterol 178mg; Sodium 192mg

Thursday, June 21, 2012

Skinny Butterscotch Bars


Summer is the time to grill, but it's also one of my favorite times to bake. Living in the Pacific Northwest the summers are a little questionable, so on those days when the clouds show up and start pouring I love to stay inside and flip on that oven. Recently I have been wanting to make bread. Yeast and I are not the best of friends. I have made bread before and for some reason the last few times I can't get past the proofing part. Well, I am going to over come my little "fear" and make some bread this weekend. Looking forward to it!

These bars are one of the most crumbly sweet treats ever. Well, they aren't really that sweet, but they really do curb that craving for sure. I know a lot of people that aren't really into sweets and these would be prefect for them. After I made them I loved them, but I thought my mother (who has the biggest sweet tooth out of any one I know) would not like them as much. She usually compliments my cooking in one way or another, but this time she stopped me to tell me how much she loved these. They are really messy, but the filling is creamy and have a great carmel flavor. These are a great low calorie snack, and one I will make many times.


Butterscotch Bars
myrecipes.com


Ingredients:
1 cup packed brown sugar
5 tablespoons butter, melted
1 teaspoon vanilla extract
1 large egg, beaten lightly
2 cups all purpose flour
2 1/3 cups quick-cooking oats
1/2 teaspoon salt
1/2 teaspoon baking soda
Cooking spray
3/4 cup fat-free sweetened condensed milk
1 1/4 cups butterscotch morsels (8oz)
1/8 teaspoon salt
1/2 cup finely chopped walnuts, toasted

Directions:
  1. Preheat oven to 350º.
  2. Combine sugar and butter in a large bowl. Stir in  vanilla and egg. Weigh or lightly spoon flour into dry measuring cups; level with a knife. Combine flour, oats, 1/2 teaspoon salt, and baking soda in a bowl. Add oat mixture to sugar mixture; stir with a fork until combined (mixture will be crumbly). Place 3 cups oat mixture into the bottom of a 13x9 in baking pan coated with cooking spray; press into bottom of pan. Set aside.
  3. Place sweetened condensed milk, butterscotch morsels, and 1/8 teaspoon salt in a microwave-safe bowl; microwave at high 1 minute or until butterscotch morsels melt, stirring every 20 seconds. Stir in walnuts. Scrape mixture into pan, spreading evenly over crust. Sprinkle evenly with remaining oat mixture, gently pressing into butterscotch mixture. Bake at 350º for 30 minutes or until the topping is golden brown. Place pan on a cooling rack; run a knife around outside edge. Cool completely. 
Makes 36 servings.
Nutrition: Calories 148; Fat 5.1g; Carb 23.4g; Cholesterol 11mg; Fiber 0.8g; Protein 2.6g; Sodium 87mg

Monday, June 18, 2012

Light Chocolate Crinkles


I love making desserts and recipes from scratch, but sometimes you just have to go the lazy way. Sometimes that lazy way is a delicious way. I found this simple recipe for cookies that I have been craving for weeks now. First I skipped over it because it included the boxed mix, but when I started to think about it, I decided why not try. For some reason I had this thinking that boxed cake/cookie mix didn't taste as good as recipes from scratch. Well that is true in most cases, but this time I do not regret buying that little blue box to makes these little cookies of goodness. They had a crumbly light flavor, but a one that made you want to go back for more. It was my first week with my new team at work, so I decided to bring them a little something as a hello from me. There were a few that came back for seconds, thirds, and even forths! I had to stash two cookies for myself, otherwise they would have been gone. If you don't want to spend tons of money or lots of ingredients, buy a box of cake mix and make these sweet chocolatey cookies without all the calories. :)


Light Chocolate Crinkles
Light Cooking cookbook


Ingredients:
1 box Moist Devil's Food Cake Mix
2 eggs
1/4 cup Puritan Oil (omega 3)
4 teaspoons milk
1/2 cup confectioners sugar

Directions:
  1. Preheat oven to 375º. Grease cookie sheets.
  2. Combine cake mix, eggs, oil, and milk in large bowl. Stir until thoroughly blended. Place confectioners sugar in small bowl. Drop rounded teaspoonfuls of dough into confectioners sugar. Roll to coat and form into balls. Place 2 inches apart on cookie sheets. 
  3. Bake at 375º for 8 to 9 minutes or until set. Cool 1 minutes on cookie sheets. Remove to cooling rack. 
Makes 3 dozen
Nutrition: (1 cookie) Calories 81; Fat 3g; Cholesterol 12mg; Sodium 121mg

Sunday, June 17, 2012

Waistline Friendly Baked Mac and Cheese


Who doesn't love to go back to their childhood with a flavorful bowl of mac and cheese? I will never get tired of this cheesy meal, but I love making it the adult way. By adult way I mean, by scratch and not out of a box. It is so easy to melt some cheese in a pan and toss it with some spices and macaroni pasta. If you are missing those nights in college when you stuffed your face with a whole box of mac and cheese (guilty of that for sure), here is a great and fast recipe to bring you back in time!


Waistline Friendly Baked Mac and Cheese
adapted from eatinglight magazine volume XX number 1


Ingredients:
 1 (14.5ox) box multigrain elbow macaroni
1 teaspoon low-sodium soy sauce
1 teaspoon onion powder
1/2 teaspoon dry mustard
1/4 teaspoon paprika
3 to 5 drops hot sauce
2 1/4 cups milk
Kosher salt and pepper
1 tablespoon cornstarch
10 oz sharp cheddar, shredded (2 1/2 cups) [plus a little extra for topping]
2 tablespoon trans-fat-free reduced fat soft tub margarine spread
1/4 cup bread crumbs

Directions:
  1. Cook the pasta according to package directions (do not add salt). Drain pasta and return to the pot.
  2. Meanwhile, in a 3-quart saucepan, combine the soy sauce, onion powder, mustard, paprika, hot sauce, 2 cups milk, 1/2 teaspoon salt and 1/8 teaspoon pepper; bring to simmer.
  3. In a small bowl, combine the cornstarch and the remaining 1/4 cup milk. Add the cornstarch mixture to the pot and bring to a boil. Reduce heat and simmer, stirring occasionally, until the mixture slightly thickens, 2-3 minutes. Remove the saucepan from heat. Add the cheese and stir until it has melted and the sauce is smooth. Add the margarine and stir until melted and combined 
  4. Pour the cheese sauce over the cooked macaroni and toss to coat. Cover the pot with a tight-fitting lid and let sit for at least 5 minutes (this helps the sauce thicken).
  5. Meanwhile, heat broiler. 
  6. Coat a broiler-proof 13x9in baking dish with cooking spray. Transfer tossed macaroni to the baking dish and sprinkle with bread crumbs and a sprinkle of cheese. Broil until golden brown, 3 to 6 minutes, checking often to make sure the top does not burn.
Makes 6 servings.
Nutrition: (1 1/2 cups) Calories 419; Fat 13g; Cholesterol 35mg; Carb 58g; Protein 25g; Fiber 6g; Sodium 680mg

Friday, June 15, 2012

Healthy Deep Dark Chocolate Biscotti


I don't think I will ever get tired of biscotti. It is one of those versatile cookies that you can not have enough of. I swear I find a new recipe each time I look. This recipe I tweaked a little. For some reason at that time I was craving dried apricots. A random craving, I know. The original recipe called for dried cranberries. You could really use any kind of dried fruit in this really. See what I mean by versatile! :)


Deep Dark Chocolate Biscotti
adapted from cookinglight.com


Ingredients:
2 cups whole wheat flour
2 tablespoons flaxseed meal
1/2 teaspoon baking soda
1/4 teaspoon salt
1/4 cup agave syrup
2 large egg whites
1 large egg
1 1/2 teaspoons vanilla extract
2/3 cup dark chocolate chips
1/2 cup unsalted almonds
1/4 cup dried apricots, chopped

Directions:
  1. Preheat oven to 350º
  2. Weigh or lightly spoon flour into dry measuring cups; level with knife. Combine flour, flaxseed, soda, and salt in a bowl, stirrig with a whisk. Combine agave syrup, egg whites, and egg in a bowl; beat with a mixer at high speed for 2 minutes. Add vanilla; mix well. Add flour mixture to egg mixture; stir until combined. Fold in chocolate, apricots, and almonds. Divide dough into 3 equal portions. Roll each portion into a 6-in log. Arrange logs 3 inches apart on a baking sheet lined with parchment paper. Pat to a 1-inch thickness. Bake at 350º for 28 minutes or until firm.
  3. Remove logs from baking sheet; cool 10 minutes on a wire rack. When cool, cut rolls diagonally into 30 (1/2-in) slices. Place, cut sides down, on baking sheet. Reduce oven temperature to 325º; bake 7 minutes. Turn cookies over; bake another 7 minutes (cookies will be slightly soft in center but will harden as they cool). Remove from baking sheet; cook on wire rack.
Makes 30 cookies.
Nutrition: (per cookie) Calories 87; Fat 3g; Carb 14mg; Cholesterol 7mg; Fiber 2g; Protein 2g

Wednesday, June 13, 2012

Sun-dried Tomato & Goat Cheese Herbed Pizza


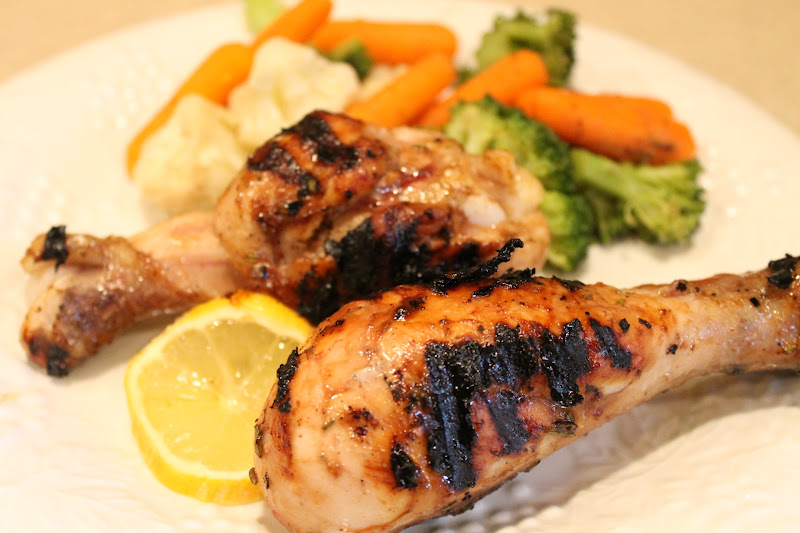
Finally got my day off, and I'm spending it in the kitchen. Stocking up on some Make-ahead English Muffin Breakfast Sandwiches. I am perfecting my technique so they will be even better. Today will definitely put me in a better mood to finish off this week, and this month! Next month I get a whole week with my favorite person. He is coming home on leave and I need to stock up on things he'll like and recipes I know he wants to try. I am one lucky girl because he likes to cook, maybe not as much as me, but when he gets in the kitchen it's always a fantastic meal. He is much better at just grabbing random ingredients and throwing them together. As for me, I like to follow a recipe, but I'm getting better at coming up with my own. This particular recipe was one I really wanted to try. I found a recipe kind of like the one I had in my head to help me out with the measurements, but the idea started in my little ol' brain. 

One thing about this recipe I was really excited for? I got to use my fresh herbs for the first time. I bought a pre-potted herb garden from Trader Joe's, my favorite grocery store.  Normally I am that person that kills plants, I just suck at keeping them alive. I was really nervous to start any kind of herb garden, but when I found that pot I decided to try it out. Well it's been almost 4 weeks now, and they are still thriving. I found a sweet little standing planter and replanted the herbs with some fresh potting mix. Every time I come home now I am greeted by my little herb garden! Now I am dying to get more herbs and maybe someday have a nice little garden growing in my backyard.


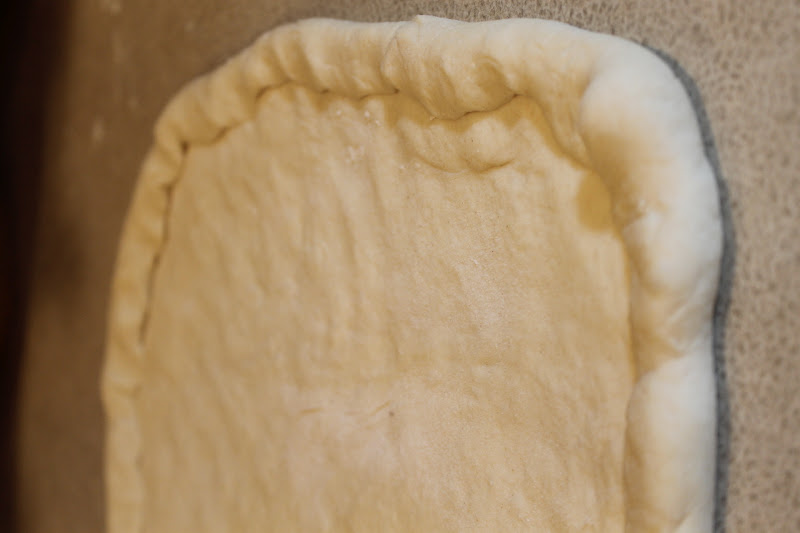
Brushing the entire dough, even the edges, keeps the pizza moist and gives it a beautiful golden color. Evidence below. :)


Pizza is one of the easiest meals to personalize. I didn't want to pack this pizza with toppings, but you are more than welcome to pile the cheese on, or even add any other kind of toppings you can think of!
Sun-dried Tomato & Goat Cheese Herbed Pizza 
adapted from foodnetwork magazine


Ingredients:
1 pound of refrigerated whole wheat pizza dough
olive oil
thyme, chopped
oregano, chopped
2 tablespoons julienned sun-dried tomatoes in olive oil
2 oz crumbled goat cheese

Directions:

  1. Place a pizza stone or an inverted baking sheet on the lowest oven rack and preheat oven to 500º.
  2. Stretch pizza dough on a floured surface to desired size.
  3. Remove pizza stone or sheet from oven. Carefully place dough on stone. Working quickly brush olive oil on pizza, covering it evenly, edges and all. Sprinkle with herbs, sun-dried tomatoes, and cheese.
  4. Place pizza in oven and bake until golden, about 10-15 minutes. Check at 10 minutes to make sure it doesn't burn. 
  5. Let pizza rest for 5 minutes on stone, then cut into 8 wedges. Serve alone, or with desired side.
Serves 4
Nutrition: (2 slices) Calories 356mg; Fat 15g; Carbs 51g; Cholesterol 8mg; Fiber 8g; Protein 8g

Broiled Parmesan Tomatoes
taste of home guilt free cooking cookbook

Ingredients:
3 large tomatoes
1 tablespoon olive oil
1 garlic clove, minced
1/4 teaspoon coarsely ground pepper
1 tablespoon minced fresh basil or 1 teaspoon dried basil
3/4 cup soft bread crumbs
2 tablespoons grated parmesan cheese

Directions:
  1. Slice tomatoes in half. Using a small spoon, remove seeds. Place tomato halves on a broiler pan coated with cooking spray. Combine the oil, garlic and pepper. Brush over tomatoes. Sprinkle with basil.
  2. Broil about 6in from the heat for 3-4 minutes or until heath through. In a small bowl, combine the bread crumbs and parmesan cheese. Sprinkle over tomatoes. Broil 1-2 minutes longer or until crumbs are lightly browned. Serve immediately.
Makes 6 servings
Nutrition: (1 tomato half) Calories 55; Fat 3g; Cholesterol 1mg; Sodium 64mg; Carbs 6g; Fiber 1g; Protein 2g

LinkWithin

Related Posts Plugin for WordPress, Blogger...