Monday, September 26, 2011

Spinach and Artichoke Dip


If you have a tailgating party, or just a sunday night football gathering this dish has to be invited! When I served this at my last tailgating party I waited for guests to have a bite before I told them it was low fat. They were all splendidly surprised. 

I served this with homemade baked tortilla chips. To make those all you do is take corn tortillas and cut them into wedges. Place them in a single layer on a baking dish sprayed with cooking spray and bake them for 6-7 minutes at 450' until they are crispy, but not brown. (If you want a little bit more flavor sprinkle the pre-baked chips with salt and pepper. Or if you want to go a little spicy, maybe some chili powder.)

It is best to serve this dip warm, but really it can be eaten at any temperature. If you have to transport this as I did, put it all together the night before and bake it right before you have to leave. 

Please forgive my forgetfulness in taking pictures. I was making three different recipes at one time and the taking of pictures before I put it all together was somehow forgotten. 


Spinach and Artichoke Dip (printer friendly version)

Ingredients:
2 cups (8oz) shredded part-skim mozzarella cheese, divided
1/2 cup fat-free sour cream
1/4 cup (1 oz) grated fresh Parmesan cheese, divided
1/4 teaspoon pepper
3 garlic cloves, crushed
1 (14 oz) can artichoke hearts, drained and chopped
1 (8 oz) block 1/3 less-fat cream cheese, softened
1 (8 oz) block fat-free cream cheese, softened
1 (10 oz) package frozen chopped spinach, thawed, drained, and squeeze dry

Directions:
  1. Preheat oven to 350'.
  2. Combine 1 1/2 cups mozzarella, sour cream, 2 tablespoons Parmesan, pepper and remaining 5 ingredients in a large bowl, and stir until well blended. Spoon mixture into a 1 1/2 quart baking dish. Sprinkle 1/2 cup mozzarella and 2 tablespoon Parmesan. Bake at 350' for 30 minutes or until bubbly and brown. Serve with baked tortilla chips or crackers.

Makes 4 1/2 cups
Nutrition: (serving size: 1/4 cup) Calories 99; Fat 5.5g; Protein 8.1g; Carb 4.3g; Fiber 0.5g; Cholesterol 19mg

Wednesday, September 14, 2011

Jalapeno Corn Bread


I love anything spicy. Anything that says jalapeno I want to make it. When I was visiting my soldier a few weekends ago, he surprised me with a new cookbook and I found this delicious corn bread. I have been house sitting for the past week so I had to find a recipe that I could easily do in the foreign kitchen. I was very happy when I found out this recipe would work!


One of my new favorites :) Someone knows the cookbooks I like!


I happened to buy a can of Light Santa Fe style soup a few days before and the cornbread molded perfectly! It was a delicious spicy meal.

Jalapeno Cornbread (Printer Friendly Version)
tasteofhome Guilt Free Cooking


Ingredients:
1/2 cup cornmeal
1/2 cup all-purpose flour
1 teaspoon sugar
1/2 teaspoon salt
1/4 teaspoon baking powder
1/4 teaspoon baking soda
1/4 teaspoon garlic powder
1/2 cup cream-style corn
1/4 cup egg substitute
1/4 cup reduced-fat cheddar cheese
1/4 cup fat-free milk
2 tablespoons chopped green onion
1 tablespoon butter, melted
2 teaspoon chopped seeded jalapeno pepper

Direction:

  1. In a large bowl, combine the first seven ingredients. Combine the corn, egg substitute, cheddar cheese, milk, green onion, butter and jalapeno. Stir into dry ingredients just until moistened. 
  2. Pour into a 8-in. square baking dish coated with cooking spray. Bake at 425' for 12-14 minutes or until a toothpick inserted near the center comes out clean. Cut into squares; serve warm.
Makes 9 servings
Nutrition: (per square) Calories 94; Fat 2g; Cholesterol 5mg; Sodium 261mg; Carbs 15g; Fiber 1g; Protein 4g

Sunday, September 4, 2011

Peanut Butter-Crisp Rice Bars


If you don't want to open your oven or turn on that stove; this is the recipe for you! No baking and super quick. These delicious krispie bars are really a great snack for just about anything. Even though it only asks for peanut butter topping, you are free to add anything else you may want. I have a special someone that loves peanut butter and chocolate so I added a bit of dark chocolate drizzle for him. For myself, I left half of the recipe with just peanut butter. Don't ask me why, but when peanut butter and chocolate come together I get ill. Which makes me sad, because I think Reese's are tasty. Whenever I tell people this depressing fact, they are greatly surprised. I always have to reassure them it's not me, it's my stomach. Of course, there are times when I live through the headache to have those little Reese's Pieces. :)
If you have read previous posts, you have seen that I always want to spend little money when it comes to buying ingredients. I will admit, I can be cheap. At times, it is good to by the name brands, but this recipe does not need those. If the store brand was cheaper, I definitely put that in my basket. Surprisingly, when I went to buy the peanut butter chips, I couldn't find them! The bag you see below is a mix of peanut butter and chocolate. After standing there for about three minutes I found a bag of Reese's peanut butter chips, but they were two dollars more than the combination bag. So I took the extra time to separate the chips, then spend the extra money when really it's just the brand. If you take your time at the store, you can save a lot of money here and there. It all adds up in the end!

This post was a bit delayed because of a little trip I took to visit my soldier over labor day. I knew the weekend would be a fantastic one, but I had no idea it would be one that I would remember till the day I die! Don't worry, I said yes! ;)


**Here is my little tip for you before you begin melting things... Pre-measure! I was so excited to make these (and I can get a little impatient when waiting) I lost track of my measurements and it was a big sticky mess! So, to avoid what I had to go through, take the few minutes ahead of time to pre-measure your cereal and chips, set them aside while you start the peanut butter mixture and everything will go smoothly.


Coat your hands with cooking spray when pressing the mixture into the pan, it gets very sticky!
Who doesn't want to just eat these as they are? Wish I had some vanilla ice cream to garnish :)


Peanut Butter-Crisp Rice Bars (Printer Friendly Version)
Cooking Light Complete Cookbook


Ingredients:
1/3 creamy peanut butter
1 tablespoon butter
1 (10 1/2 oz) bag miniature marshmallows
6 cups oven-toasted rice cereal (such as Rice Krispies)
Cooking Spray
3/4 cup peanut butter chips

Directions:
  1. Combine peanut butter and butter in a large microwave-safe bowl. Microwave at HIGH 30 to 45 seconds or until mixture melts. Add marshmallows; microwave at HIGH 1 minute or until smooth, stirring every 30 seconds. Add cereal to peanut butter mixture; toss until well combined. Press cereal mixture into a 13x9-inch baking pan coated with cooking spray. (Tip: mixture will be very sticky, so coat your hands with cooking spray before pressing it into the pan.)
  2. Place peanut butter chips in a small microwave-safe bowl. Microwave at HIGH 20 to 30 seconds or until chips melt. Spoon melted chips into a small heavy-duty zip-tip bag; seal. Snip a tiny hole in 1 corner of the bag; drizzle melted chips over cereal mixture. Cool slightly; cut into 24 bars. 
Makes 2 dozen.
Nutrition: (per bar) Calories 118; Fat 3.9g; Protein 2.6g; Carb 19g; Fiber 0.7g; Sodium 93mg

Wednesday, August 31, 2011

Cranberry Thanksgiving Sandwich


Eight days in a row at work really wears me out! I have taken a few more hours at work to save money and I am definitely paying for it in coffee and sleep. That is why it has taken me a while to find a good time to post. I also wanted something that wouldn't take too long and wouldn't cost a lot. This weekend I am going to visit my soldier (YAY!) so I didn't want to have any left overs that would just go bad while I'm away.

I was craving a hot panini and I found this beauty when looking for recipes. It may not be the pressed sandwich I had in mind, but this really hit the spot. With a little bit of cranberry sauce and deli turkey you can have a small taste of thanksgiving whenever you want!

Of course, after you have eaten your delicious meal you can save the cranberries and a bit of carved turkey to make this sandwich for a great Thanksgiving leftover! If you want to get a head start, deli turkey helps curb your Turkey day cravings. :)


Thanksgiving Sandwich (Printer Friendly version)
Food Network Magazine October 2010 Issue (50 Panini pull out cookbook)

Ingredients:
Sandwich sliced turkey
Cheese (deli cheese or spreadable cheese both work)
Cranberry Sauce
Potato Roll (I couldn't find a potato roll at the store, but an onion kaiser roll worked well)

Directions:
  1. Sandwich the turkey, cranberry sauce, and cheese between slices of potato bread. (As you can see I added a bit of baby arugula, I wanted a small crunch and just a little bit of veggies.)
  2. Cook in a skillet with butter until golden brown. (Do not press)
Makes 1 sandwich
Nutrition: (per sandwich) Calories 310, Fat 6g, Carbs 45mg, Protein 19g, Fiber 2g, Sodium 795g

Friday, August 19, 2011

Citrus-Roasted Salmon


This week I was offered the best deal ever. A coworker of mine has a son who loves to fish. He loves to fish, but hates salmon. Yes, he hates salmon. So, to relieve him of the burden of all that salmon I paid him $10 for a 1 pound filet of King salmon, and a whole 4 pound Silver. My dilemma with the last recipe was that salmon was too expensive...well the seafood gods decided to give me a break. 

The silver salmon still has bones so I put it in my freezer and will get a lesson in a few days on how to debone. The king salmon was deboned and precut so I went ahead with that cut for this recipe. Here is something I didn't know: skinning a salmon is tough. I even went online and watched a few videos on how to remove the skin, and I thought, "Wow, that looks really easy." I was very wrong. It took me forever, but I finally got the skin off. I'm sure it would have been okay if I left the skin on during cooking, but I wanted to follow the recipe as close as possible since it was my first time with salmon. In the end it all worked out. The salmon flaked beautifully, and was sweet yet tangy. There are definitely things I want to perfect for the next time I cook with salmon, but for my first dish I am very pleased! :)
The crushed red pepper should actually be ground red pepper. You will see why at the end. 
Another of my favorite cookbooks.


I paired this dish with grilled asparagus sprinkled with garlic and red pepper. Worked together perfectly!

Citrus-Roasted Salmon (printer friendly version)

Ingredients:
1 teaspoon grated lemon peel
2 tablespoons fresh lemon juice
2 tablespoons honey
4 teaspoons chili powder
1teaspoon cumin
1/2 teaspoon salt
1/2 teaspoon ground coriander seeds
1/4 ground red pepper
1 (6 oz) can thawed orange juice concentrate
4 (6 oz) salmon fillets, skinned (1 inch thick)
Cooking spray
Orange wedges (optional)
Parsley sprigs (optional)

Directions:
  1. Preheat oven to 400'.
  2. Combine the first 9 ingredients in a bowl, brush both sides of fish with orange mixture. Reserve remaining orange mixture. Place fish on a broiler pan coated with cooking spray. Bake at 400' for 15 minutes or until fish flakes easily when tested with a fork. 
  3. Place remaining orange mixture in a small saucepan; bring to a boil, and cook until reduced to 1/2 cup (about 2 minutes). Serve with fish, and garnish with orange wedges and parsley, if desired. 
Makes 4 servings (serving size: 1 fillet and 2 tablespoons orange sauce)
Nutrition: Calories 366; Fat 13.5g; Protein 33.5g; Carb 27g; Sodium 399mg

*As I was copying down the recipe I realized that I read an ingredient wrong. I apparently read "crushed red pepper" and not "ground red pepper" (which is normally cayenne). Well, as least I know that it will taste good, just a bit different, the next time I make this. :) 


Sunday, August 14, 2011

Spicy Tilapia


I have never cooked seafood before. Nor have I ever had Tilapia. This was an adventure and a challenge to myself. For this recipe I asked a certain someone what I should cook, and he instantly said seafood. I was a little skeptical at first because I had no idea how to cook fish. We went back and forth on salmon and tilapia before I finally settled on this recipe. I was leaning a little more toward salmon at first, because I know I like salmon, but the store I walked to had tilapia for a little cheaper. So price made the decision for me. :)

Now, once again, I ventured away from my magazines and cookbooks. I was given this recipe first and really liked it, but I really wanted to go through my cookbooks before cooking since the last recipe was from the internet as well. I looked through all of my books and magazines, but found no tilapia recipe like the one I had in my hand. This recipe was smart for me to try since I don't like the fishy taste of seafood, so the spicy was good to cover it up (If there would have been...there was no fishy taste at all). Not one recipe in my books. Not one. So I promise that the next recipe will be from my own collection.

Now my repertoire of dishes expands even further, and I am proud of myself for trying something new just like that. I can't wait to cook this for dinner when my soldier gets home! The fish came out perfectly. It was juicy, and pulled apart nicely. I would almost call it blackened tilapia, but this title definitely lives up to it's name. Not too spicy, but enough to get the taste buds moving!

If you have these spices in your cupboard this dish can end up being very cheap!


There are so many things you can do for a side with this recipe. The spice is strong so I sprinkled chili powder and pepper on the corn to match flavors, but you can go with another kind of vegetable or rice. It's a blank canvas for you!


Ingredients:
3 tilapia fillets (about 1lb)
1 teaspoon dried oregano
1 teaspoon dried basil
2 teaspoons chili powder
1/4 teaspoon cayenne pepper
1/2 teaspoon salt
3 tablespoons butter
1/2 cup lemon juice

Directions:
  1. Place fish in a glass pan and preheat oven to 350'.
  2. Combine and melt the butter and lemon juice in the microwave, then pour over the fillets.
  3. Sprinkle the remaining ingredients (vary amounts of each to your liking).
  4. Bake for 30 minutes.
Serves 2 (not including side)
Nutrition: (1.5 fillets) Calories 179.2; Fat 17.8g; Cholesterol 45.8mg; Sodium 731.1mg; Protein 0.8g; Carb 7.3g 


Wednesday, August 10, 2011

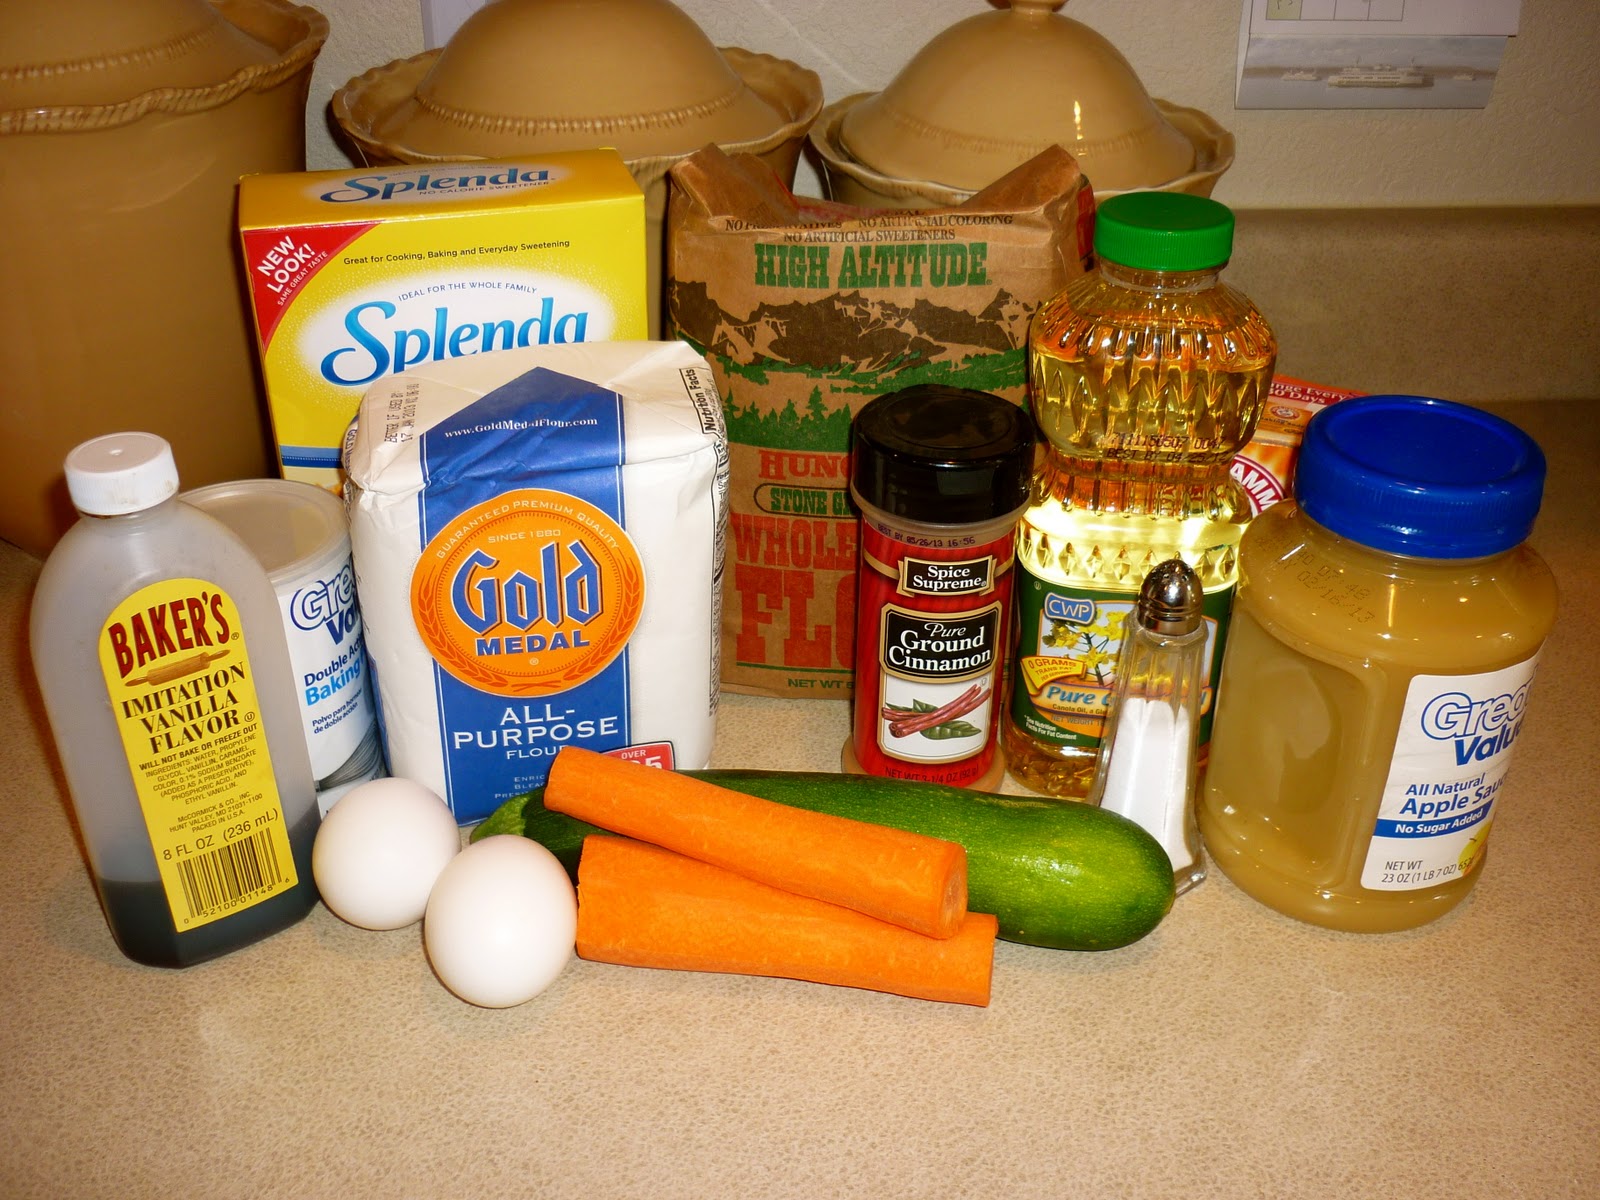
Carrot Zucchini Muffins


Just because you see carrot and zucchini in the same food title as muffin, don't think these are not sweet and delicious! I could eat the entire dozen in one sitting. I love these. At my work they have these muffins, but they are gigantic and probably around 300 calories. That's almost an entire meal. So, instead of spending my money and wasting calories, I decided to makes these little babies myself.

The recipe I found (online at sparkrecipes.com) did not include any dried fruit. At work they have raisins and walnuts. I love the raisins, but I don't really like the walnuts. Even though the recipe I used did not ask for dried fruit, I decided to throw in a little dried cranberries. They add this tiny little pop of sweetness that makes me want to eat all of them!

The dried cranberries are not pictured because they were a last minute addition.


That device is one of the best cooking tools I have. You can change the top and do different things, even separate eggs! Can you tell I love kitchenware. :) 

Action shot!
I used an ice cream scoop to make these as even as possible. I think I did a pretty good job :)


Carrot Zucchini Muffins (Printer friendly version)
Ingredients:
1 cup flour
1/2 cup whole wheat flour
1 cup Splenda granulated sugar
1 teaspoon baking powder
1 teaspoon ground cinnamon
1/2 teaspoon salt
1/2 teaspoon baking soda
1/2 cup canola oil
1/4 cup unsweetened applesauce
2 large eggs (or equivalent in egg substitute)
1 teaspoon vanilla
1 cup shredded carrot
1 cup shredded zucchini

Directions:
  1. Shred your carrot and zucchini.
  2. Preheat oven to 350'.
  3. Line muffin tins with paper liners, or spray tin with non-stick cooking spray.
  4. Combine dry ingredients in a large bowl.
  5. In a small bowl beat together oil, applesauce, eggs, and vanilla. 
  6. Stir into dry ingredients just until mixed (mixture will be thick). 
  7. Fold in carrots and zucchini.
  8. Spoon into prepared muffin tin.
  9. Bake for 20-25 minutes.
  10. Cool on wire racks.
Makes 12 muffins.
Nutrition: (per muffin) Calories ~155g; Fat ~10.5; Carbs ~17g; Protein ~3g


The aftermath! The only thing I don't like about being in the kitchen. :)


LinkWithin

Related Posts Plugin for WordPress, Blogger...