Sunday, April 8, 2012

Light Alfredo Sauce


It's spring and that usually means Spring Cleaning! I have had the last week off before I start a new job so I had to find things to do around the house. Of course I stocked up on recipes and had a few craft projects (as you can see from my new Recipe Binder from the last post). Then I had the urge to reorganize almost everything. I never really got the bug for spring cleaning before. In fact, it wasn't until my mother mentioned my sudden need to clean that I realized what was happening. The weather has changed to something a little bit more tolerant, I start a completely new career tomorrow, and we have finally made it through 1/4 of this overseas tour. A lot of changes in the last few weeks, and of course a bit more time on my hands has given me the chance to makes things new. I like having my life a little bit more organized, and I like it when somethings get a makeover. Just like the blog today! 

As you can see I made a few changes to the look. I woke up this morning and looked at the dreary colors on this blog. All beige and brown. Very winter and fall to me. So I thought that adding a little more color would make things brighten up. I enjoy bright colors and the mood it can put people in. Hope you enjoy my sudden need for makeovers. :)


I was out of fettucini pasta, so I had to go with penne. You can use any pasta you wish, but I wish I had had fettucini!


Light Alfredo Sauce
CookingLight Complete Cookbook


Ingredients:
1 tablespoon butter
1 1/4 cups half-and-half
3/4 cups (3oz) grated fresh Parmesan cheese
1/2 teaspoon salt
1/4 teaspoon freshly ground black pepper

Directions:
  1. Melt butter in a large skillet over medium heat. Add half-and-half, cheese, salt, and black pepper; cook 1 minute; stirring constantly. Pour over pasta. 
Makes 1 1/2 cups
Nutrition: (per serving 1/4 cups) Calories 145; Fat 11g; Protein 7.2mg; Carb 2.3g; Fiber 0mg; Cholesterol 42mg

Friday, April 6, 2012

Lightened Carrot Cake with Cream Cheese Frosting


This weekend is Easter weekend, and everyone is dying their eggs and stuffing them in corners around their yard. You know what this weekend also means? It means easter candy! I don't have candy that often, so every year around this time, I buy myself a large bag of Robin Eggs. You know, the best candy ever! Well, I have to trust my will power here and I feel like I have mastered the art of the Robin Egg Stashing. Ever summer you could open my freezer and probably find a half full bag of frozen little chocolate eggs. This way I can have my eggs all year round, and not feel guilty about having a few once in a while! Those Robin Eggs are definitely my guilty pleasure.

This week was also my week off before I started a new job, and I lined up a few recipes and craft projects to keep myself busy. A few weeks ago I was going through my cookbooks and I noticed that I had a lot of loose printed recipes in between pages and books. I have a recipe book that I can write in, but I had a lot of printed recipes and I wasn't going to sit and write them all out. So I remembered a post I had seen on Pinterest about making a recipe binder. I thought that was such a good idea! So I went to the store and bought a 1" ring binder, a large pack of protective paper sleeves, and some dividing tabs. Not very expensive at all. Then I went online and found a "recipe binder cover template" and I worked my amateur skills on paintbrush/photoshop and printed out a back, front, and side cover! 


It was very simple and quick, and it's pretty! :) I spent the most time trying to categorize all of the recipes, because I only had 8 tabs (should have bought more). After I made my tabs and had my recipes in their respective categories, I slid all of the pages into protective covers; even the tabs because in the covers the pages came out further than the tabs. So I just cut small slits for the tabs to poke out. The protective covers are great because you can take out the page you are using and you don't have to worry about getting any food on them! Now I have a great place to put the recipes I print out. No more searching for them between cookbook pages. :)


Now go and make a delicious light Carrot Cake with almost 1/2 the calories! Happy Easter everyone! 


Here are your ingredients for the cake. I didn't have any buttermilk, so I placed 1 tablespoon lemon juice in the bottom of my measuring cup and then filled it with milk until it reached 1 cup. I left it to sit for at least 5 minutes, and there you have it, Homemade Buttermilk! (You can also use white vinegar in place of the lemon juice.)


Here are the ingredients for your easy frosting!


The recipe originally said pecans, but I had walnuts in my cupboard so that is what I used. 

Moist and sweet! So delicious. You couldn't even tell this was a lighter version of the original. 

Carrot Cake with Cream Cheese Frosting
adapted from Cooking Light Magazine - April 2011 Issue


Ingredients:
Cake:
2 1/4 cups all purpose flour
2 teaspoon baking powder
1 1/2 teaspoons ground cinnamon
1/4 teaspoon salt
1 cup granulated sugar
1/2 cup packed brown sugar
6 tablespoon butter, softened
3 large eggs
1 teaspoon vanilla extract
1/2 cup low-fat buttermilk (To make your own mix 1 cup milk and 1 tablespoon lemon. Let sit for 5 min before using in recipe.)

Frosting:
8 oz non-fat cream cheese
1 teaspoon vanilla extract
1 cup powdered sugar

Direction:
  1. Preheat oven to 350º.
  2. To prepare cake, weigh or lightly spoon flour into dry measuring cups, and level with a knife. Combine flour, 2 tablespoons baking powder, ground cinnamon, and 1/4 teaspoon salt in a medium bowl; stirring with a whisk. Add 2 cups grated carrot, tossing to combine. 
  3. Place granulated sugar, brown sugar, and 6 tablespoons butter in a large bowl. Beat with a mixer at medium speed until combined. Add eggs, 1 at a time, beating well after each addition. Stir in 1 teaspoon vanilla. Add flour mixture and buttermilk alternately to sugar mixture, beginning and ending with flour mixture. Spread batter into 13x9in metal pan coated with cooking spray (if using glass pan, reduce heat by 25º). Bake at 350º for 28 minutes or until a wooden pick inserted in the center comes out clean. Cool cake completely on a wire rack. 
  4. To prepare frosting, place cream cheese, vanilla, and powdered sugar in a bowl; stirring until combined with a whisk (do not over mix). Spread frosting evenly over cooled cake. Sprinkle evenly with nuts (walnuts, pecans, etc.).
Serves 20.
Nutrition: (per slice) Calories 162; Fat 3g; Carb 18g; Cholesterol 28mg; Protein 4g; Fiber 1g

Tuesday, April 3, 2012

Fruit & Nuts Granola Bar


These bars are a great snack to stuff in your lunchbox, curb your mid-afternoon craving, or send overseas. They are full of nutrition and a great source of protein and fiber!

Now I have never toasted nuts before, and I found that when you do they add a bit of an earthy taste to your recipe. The bars were delicious, but I wasn't a big fan of the toasted nuts. I felt that they over powered the other flavors. If I were to do this recipe again, I would omit the toasting and just add the raw nuts. Of course I didn't read the recipe close enough (like usual) and I used the wrong pan, giving the bars the wrong texture and size. It didn't ruin them, but I'm sure they would have tasted differently if I did what the recipe had asked for. That goes to show you that reading the recipe over and over again before you start is VERY important. :)

That peanut butter is the best I have ever had! I go through jars so fast. Better 'N Peanut Butter from Trader Joe's. Go and buy a jar now...Go!

Toasting the nuts. You can skip this step if you don't want a strong nut flavor, but if you like it by all means, go right ahead! Here is the link I followed, great tips: How To Toast Nuts by My Baking Addiction


Here they are ready for the mail! I wrapped each bar individually then placed them all in a large freezer bag. It takes a week when I ship boxes and they were in good condition when they got to my soldier. 
Fruit & Nuts Granola Bar
Chiriji


Ingredients: 
4 cups old fashioned rolled oats
1/2 cup flour (all purpose, whole wheat...any kind of flour works)
1/2 cup toasted wheat germ
2 cups toasted nuts (I used almonds, pecans, and walnuts. Other options: pepitas, sunflower seeds...etc)
2 cups dried fruit (I used dried cranberries, but you may use as many flavors as you wish; raisins, shredded coconut, dried apricots...etc)
1 tsp ground cinnamon
1 1/2 tsp salt

1/2 cup peanut butter
2/3 cup honey
1/3 cup light corn syrup (I didn't have corn syrup so I substituted the equal amount of honey to LCS)
1 tsp vanilla extract

Directions:
  1. Preheat oven to 350º
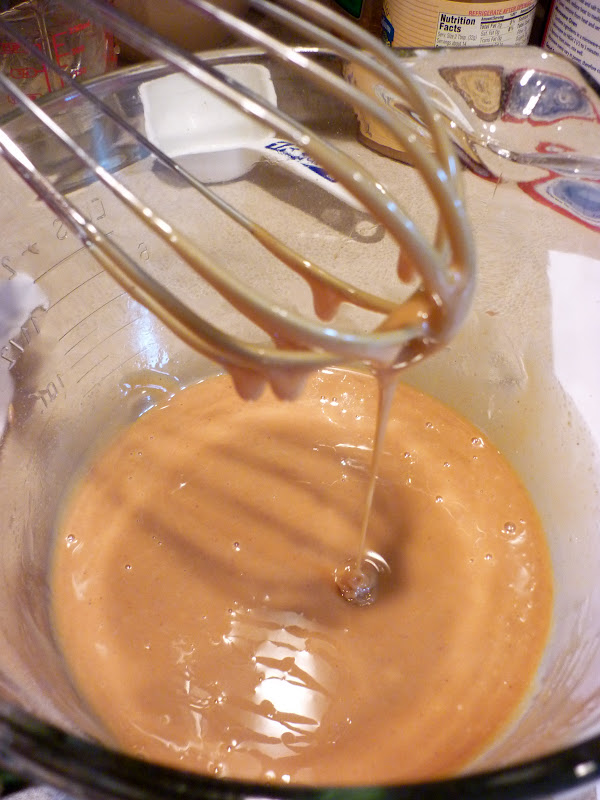
  2. Combine all dry ingredients in a large bowl. Whisk together wet ingredients and microwave for 30-50 seconds until very runny. (My wet ingredients were already very runny so I did not need to microwave my wet ingredients)
  3. Pour the warmed honey mixture over dry ingredients and mix until it is evenly crumbly. Spread and press down firmly into a large 11x17 in parchment lined pan, or multiple small pans that will yield 1/2 inch bars. *
  4. For soft and chewy bars, bake in oven for about 20-25 minutes. If you like your granola bars on the crunchy side, bake for 30-40 minutes until the edges are golden brown. Rotate the pan half way through to ensure even baking. Let cook to cool temperature before cutting into bars. 
*My mistake: For some reason I thought I had to use a 11x7 dish, not a 11x17in pan. So my bars were much thicker than what the recipe called for. They were still very good. I cooked them for 30 minutes and they were nice and chewy. 

Makes 36 bars.
Nutrition: Calories 144; Fat 7g; Carb 18g; Cholesterol 0mg; Protein 4g; Fiber 3g

Saturday, March 31, 2012

Crock Pot Chicken Fajitas


For the next few days I am all by myself for the first time in two years. My mom is off visiting family, and my husband is still overseas...so it's just me and two cats. It's so weird waking up in an empty house. It is even more weird cooking for just myself! This may be good practice for me when we get stationed across the country and he may be deployed. I guess I should start learning how to cook for one now, huh? The sad thing? I really want to make cupcakes, but I do not want a dozen cupcakes sitting around when it's only me, and I could possibly eat them all! Who wants me to make them cupcakes? :)
I also added one large jalapeno, seeded and sliced thinly. 


With about 45 minutes to go, I decided there needed to be a bit more spice so I added about 2 tablespoons hot sauce.  Yum!


Crock Pot Chicken Fajitas
food.com


Ingredients:
1 1/2 pounds chicken breast, cut into strips
1 sweet onion, cut into thin wedges and separated
2 tablespoons lime juice
1-2 garlic cloves, minced or 1 teaspoon garlic powder
3/4 teaspoon ground cumin
1 teaspoon seasoning salt
1/2 teaspoon chili powder
1 green bell pepper, thinly sliced (optional)
6-8 flour tortillas, warmed
shredded cheese (optional)
salsa (optional)
sour cream (optional)
shredded lettuce (optional)

Directions:
  1. Place chicken and onions (and peppers, if using) in crock pot. Sprinkle spices all over. Add lime juice and stir well.
  2. Cook on low for 4-6 hours, stirring once or twice. If you start with frozen chicken breast, you might need to cook for longer than 6 hours. 
  3. Serve in warm tortillas with your favorite fajita toppings. 
Makes 6-8 servings.
Nutrition: (per serving if serving 6 people) Calories 299.7; Fat 12.9g; Cholesterol 72.6mg; Sodium 267.3mg; Carb 17.9g; Protein 26.4g; Fiber 1.3g

Wednesday, March 28, 2012

Double Apple Bran Muffins


If you are anything like me, you probably get random cravings for odd things. Somedays I will be craving a steak, or mexican food. Others I'm craving pasta, or cookies. My cravings for muffins are always strong ones. I will have muffins here and there until my craving is satisfied. This last craving I had for muffins took a long time to get over. Before this recipe I tried a different kind that I was really looking forward to. The recipe itself I found online and the reviews were kind of iffy, but I still tried it anyways. I should have listened to what the people were saying. I ate a couple, and then decided they were just not worth it and threw them away. That just goes to show you it's not always the cook, sometimes it's the recipe. After that I was still craving a delicious big muffin to have with my coffee in the mornings. So I continued to look for a recipe, and I came across this one. All I have to say is that I will be making these again and again. Oh my goodness were they delicious! Healthy and sweet. I couldn't have asked for more in a muffin. Well perhaps a million dollars, but that might be a bit much for a baked good. :)


Double Apple Bran Muffins
cookinglight.com

Ingredients:
1/2 cup packed brown sugar
1/4 cup butter, softened
1 large egg
1 large egg white
3/4 cup fat-free milk
1/4 cup unsweetened applesauce
1 tablespoon molasses
1/2 teaspoon vanilla extract
1 cup all-purpose flour (about 4.5 oz)
1/2 cup oat bran
1 1/2 teaspoons baking powder
3/4 teaspoon salt
1/2 teaspoon ground cinnamon
1/2 cup coarsely chopped, peeled Granny Smith apple
2 teaspoons turbinado sugar (optional)*

Directions:
  1. Preheat oven to 400º
  2. Place 12 paper muffin cup lines in muffin cups (or spray with non-stick cooking spray); set aside.
  3. Combine brown sugar and butter in a medium bowl; beat with a mixer at medium-high speed until light and fluffy (about 5 minutes). Add egg; beat 1 minute or until well blended. Beat in egg white until well blended. Add milk, applesauce, molasses, and vanilla extract; beat on low speed until well blended.
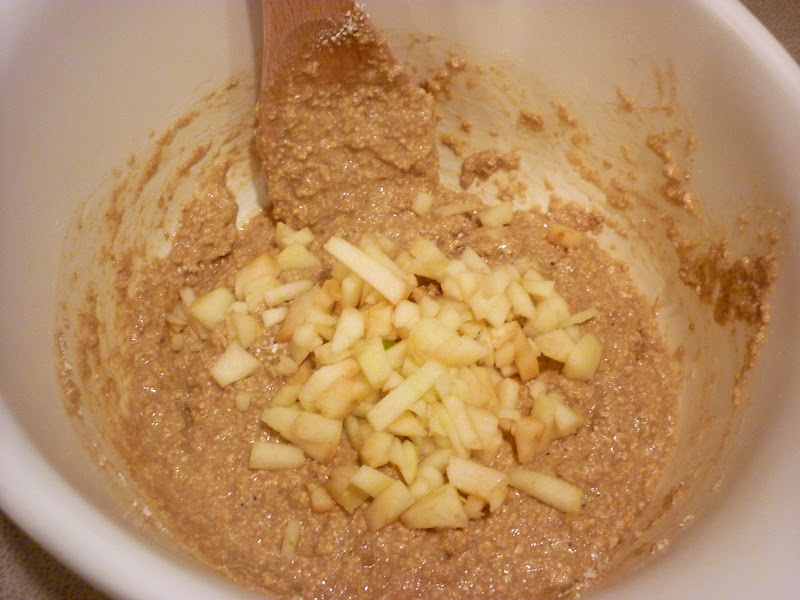
  4. Lightly spoon flour into a dry measuring cup; level with a knife. Combine flour, oat bran, baking powder, salt, and cinnamon in a large bowl; make a well in center of mixture. Add milk mixture to flour mixture, stirring just until moist. Gently stir in apples. 
  5. Spoon batter evenly into prepared muffin cups. Sprinkle evenly with turbinado sugar, if desired. Bake at 400º for 18 minutes or until muffins spring back when touched lightly in center. 
*If you do not have turbinado sugar like me, brown sugar is a good substitute. I used no where near 2 teaspoons, so I think you can use as little or as much as you'd like. If you like a little bit more sweetness I suggest sprinkling a little bit of something on the top of these already delicious muffins.

Makes 12 large muffins.
Nutrition: (per muffins) Calories 174; Fat 5.6g; Protein 5.2g; Fiber 3g; Cholesterol 28mg; Sodium 258mg

Sunday, March 25, 2012

Guilt Free Spinach Burritos


This weekend is the best weather we have had all year up here in the Pacific Northwest. I made a point to get outside, even if for a little bit. When the sun comes out and the allergies hit, it makes me want to pull out the barbecue and grill just about anything. Once summer hits I will probable be posting a lot of grilling recipes. This summer I am determined to grill a pizza. I have never eaten one or made one, and I look forward to it! 

These vegetarian burritos were delicious! I had cheese in my fridge so I didn't but any cheddar that the recipe asked for. As I said before, I always squirm at the mention of cheddar. I really don't know why. Anyways, the Lite Mexican Blend I had in my fridge went really well with this recipe. I used whole wheat tortillas, which worked out fine, but I think I would have used regular flour if I had the chance. At the store I was looking for the fat free 10 inch tortillas, but I couldn't find any in that size. So I settled for the wheat, which I probably would have gone for in the first place. I just think the regular flour would have tasted a bit better, and cooked nicer in the oven. Other than that, this recipe was healthy and delicious! 


Spinach Burritos
Taste of Home Guilt Free Cooking


Ingredients:
1/2 cup chopped onion
2 garlic cloves, minced
2 teaspoons margarine
1 package (10 oz) frozen chopped spinach, thawed and squeezed dry
1/8 teaspoon pepper
6 fat-free flour tortillas (10 inches)
3/4 cup picante sauce, divided
2 cups (8 oz) shredded reduced-fat cheddar cheese, divided


Directions:
  1. Preheat oven to 350º
  2. In a skillet, saute the onion and garlic in margarine until tender. Add the spinach and pepper; cook for 2-3 minutes or until heated through. Place about 3 tablespoonfuls on each tortilla; top with 1 tablespoon of picante sauce and 2 tablespoons of cheese.
  3. Roll up and place seam side down in a 13-inch x 9-inch x 2-inch baking dish coated with cooking spray. Top with remaining picante sauce and cheese. Bake, uncovered, at 350º for 20-25 minutes or until sauce is bubbly and cheese is melted.

Makes 6 servings
Nutrition: (1 burrito) Calories 262; Fat 9g; Cholesterol 25mg; Sodium 550mg; Carb 31g; Fiber 0g; Protein 17g

LinkWithin

Related Posts Plugin for WordPress, Blogger...