Wednesday, April 10, 2013

Beer Infused Pizza Dough (with Homemade Barbecue Sauce recipe)


I have to say I am really proud to post this recipe. Last night I made a completely homemade pizza, down to the dough and sauce. When I plan the next weeks menu, I try to ask my husband what he is craving. This time he showed me a recipe for Beer Infused Pizza Dough; that used one of our favorite beers. Going a little off topic here: Recently, he has been getting me to try more craft beers. Now I am proud to say I am all about the fancy full flavor beers, and not just the big brewery beers (like coors or bud). Every week we try to find a small brewery variety pack. Just to expand our beer repertoire. I'm finding one of my favorites is Sam Adams. I started with their winter variety pack, but now since it's spring I'm going for their spring variety. My husband is proud of me whenever I just try a new beer now without even blinking. :)

Anyways, back to the pizza! Yes, this dough is made with beer, and it was the easiest dough I have ever made. Normally you have to proof the yeast, but not with this recipe. It took less than 15 minutes to mix everything together. You do have to plan for the dough to rise, so save this for a day off or weekend. One thing you want to make sure of is the temperature of the beer. If it is too hot it will kill the yeast; if it's too cold it wont wake up the yeast. I actually bought my thermometer with yeast in mind, because I always killed my yeast. Yes, I'm confessing. :/ After the dough had risen, I decided to save one of the rounds. I'm glad I did because this pizza was so good! The dough has a slightly different flavor. It has a fuller, deeper flavor than regular dough made with water. When you have the dough shaped you can use anything you want for toppings. The day before I had made homemade barbecue sauce, so we decide on BBQ Chicken Pizza. The sauce was so easy to make, and it made a lot so you can save some for later. I made the sauce extra spicy, because we looove spicy! Since the sauce was so easy I decided to include it at the bottom. ***

Seriously, this pizza was so good. It came together in no time, and I was proud that it was completely homemade. Don't be scared of making your own pizza dough. It's one of the easiest things you could do, and it tastes ten times better than any store bought dough!

That's it! So simple right?!
I'm not sure if it's a blessing or a curse, but the water from our faucets can get really really hot; so I didn't have to warm up the water at all. First, I left the bottle on the counter till it got to room temperature. Then I just placed the bottle into a large bowl and filled the bowl from the faucet up to the bottleneck. It didn't take more than 10 minutes for the beer to get to the perfect temperature. 


Take your time as you stretch the dough. Make sure you get out as much air as possible, otherwise you will get bubbles during baking. 
We decided to do a BBQ Chicken pizza since I had just make homemade barbecue sauce the day before. I included the recipe below! :) ***

Beer Infused Pizza Dough
adapted from Men's Journal

Ingredients:
3 1/2 cups all-purpose flour (plus more for dusting) *
1 packet instant, high active yeast
1 tablespoon fine granulated salt
1 tablespoon extra virgin olive oil
1 bottle Sam Adams Boston Lager (warmed to 120-130º) **

*As I was making this I was thinking about trying this out with wheat flour. I haven't tried it yet, but I will be doing it soon, and will update!
**I have researched and found that some beers work, and some don't. Pretty sure it's all about trial and error. One thing I read, is that it really makes a difference if you use "active yeast" beers. There are recipes where that type of beer can substitute for the yeast. Now, I'm not so certain about that. Although I will be trying out different beers in the future.

Directions:

  1. Warm the beer in a bowl of very warm, not boiling, water. If you don't have a thermometer, the beet should feel very warm to the touch.
  2. Meanwhile, in a large bowl combine flour, yeast, salt, and oil. When blended, create a pile in the center.
  3. When beer is warm, pour around flour pile creating a "moat". Stir with a fork until the dough is lumpy, then start kneading with hands. The dough should feel a little sticky, gradually add flour as your knead until it is just slightly tacky. Knead slowly by pressing down, folding it inside-out, and repeating.
  4. Split the dough into two equal sized pieces. Form each piece into a ball and place in an airtight container, sprayed lightly with cooking spray. 
  5. Place in a warm location (about 70-80 degrees). Should take about 1-2 hours, or until dough as doubled in size. To make sure it is ready press two fingers into dough; if indentations remain dough is ready. 
  6. If you plan on using both pieces of dough immediately skip this step. If you plan on saving the second ball of dough continue to read. Take one ball and place on a piece of plastic wrap that has been sprayed lightly with cooking spray. Wrap dough and place in a freezer bag. If you have a food sealer, suck out all of the air. If you don't have a food sealer, squeeze out as much air as possible. Place dough into freezer for up to 3 weeks. When ready to use dough, thaw in fridge for up to 12 hours or overnight. Half hour before use, put out onto counter top and let dough rest and get to room temperature. 
  7. When ready to use dough, stretch into size of a greased cookie sheet or a pizza stone. Tips on how to stretch dough: First be patient. I start by pressing down on the dough with my finger tips to take out any air. While doing this I start to shape it into a circle; making a border around the edge. Then I think of being a DJ. Spinning the dough in a circle with one hand as I stretch it equally in a circle with the other hand going the other directions. There are great videos all over the internet with instructions on stretching dough. That's where I learned. :)
  8. When in the shape and size you desire, put on all of your favorite toppings. Place pizza into a preheated 500º oven and cook for 10-15 minutes. *If using a pizza stone, place in oven while it is preheating. Be careful when removing stone as it will be very very hot. 
Makes 2 rounds of dough for 12" to 14" pizza.

***
Homemade Barbecue Sauce
adapted from Better Homes and Gardens Slow Cooker Magazine

Ingredients:
2 1/2 cups ketchup
1 cup finely chopped onions (about 3/4 of a large onion)
1/4 cup packed brown sugar
3 tablespoons cider vinegar
3 1/2 tablespoons Worcestershire sauce (I ended up adding more near the end)
3 cloves garlic, minced
1 teaspoon hot sauce, less or more to taste (you could use mexican hot sauce, chipotle sauce; anything you have in your cupboard)

Directions:
  1. Combine all ingredients into a medium sized sauce pan. Bring to boiling; reduce heat. Cover and let simmer for 15 minutes, stirring occasionally. Use immediately or let cool and place in an airtight container. Store in refrigerator for up to 3 days. 
Makes 3 1/2 cups. 

Wednesday, March 27, 2013

Chicken and Shrimp Jambalaya


Spring is here, but you wouldn't know it by the weather we have been having here in Colorado Springs. Snow one day, then it melts the next, two days later it's back. I'm so ready for warmer weather.  This is a great recipe for one of those snowy spring days. Just put everything in the crock pot during the day and your house will be warm and smell fantastic by dinner time. I love crock pot recipes, because I don't have to be in the kitchen the entire my husband is home after work to just cook. Everything is already cooked and I can sit and watch an episode of The Walking Dead or Game of Thrones before we eat. We are really big nerds if you didn't know. :)

I know some germ freaks are probably out there wondering how I could put veggies on the same cutting board as the chicken. Don't worry, I was very careful to put the chicken down then not move it, and none of the veggies touched the chicken. Trust me I am a clean freak every time I use raw poultry. 


Chicken and Shrimp Jambalaya
Betterhome and Garden's Slowcooker Mag

Ingredients:
1 lb skinless, boneless chicken breast halves or thighs
2 cups thinly sliced celery (about 4 stalks)
2 cups chopped onions (2 large)
1 (14.5oz) can no-salt-added diced tomatoes, undrained
1 (14.5oz) can reduced-sodium chicken broth
1/3 cup no-salt-added tomato paste
1  1/2 teaspoon salt-free cajun seasoning
2 garlic cloves, minced
1/2 teaspoon slat
8 oz fresh or frozen peeled and deveined shrimp (keep tails on if desired)
1 1/2 cups uncooked instant brown rice
3/4 cup chopped green, red, or yellow bell pepper
2 tablespoons snipped fresh parsley
Celery leaves (optional)

Directions:
  1. Cut chicken into 3/4-inch pieces. In a 3 1/2or 4 quart slow cooker combine chicken, celery, onions, tomatoes, broth, tomato paste, cajun seasoning, garlic, and salt.
  2. Cover and cook on low-heat setting for 4 1/2 to 5 1/2 hours or on high-heat setting for 2 1/4 to 2 3/4 hours.
  3. Thaw shrimp, if frozen; set aside. If using low-heat setting, turn to high heat setting. Stir in uncooked brown rice and bell pepper. Cover and cook for about 30 minutes more or until most of the liquid is absorbed and rice is tender.
  4. Before serving, stir shrimp and parsley into chicken mixture. If desired, garnish each serving with celery leaves.
Serves 8
Nutrition: Calories 211; Fat 2g; Cholesterol 88mg; Protein 23g; Fiber 4g; Carb 26g

Monday, March 18, 2013

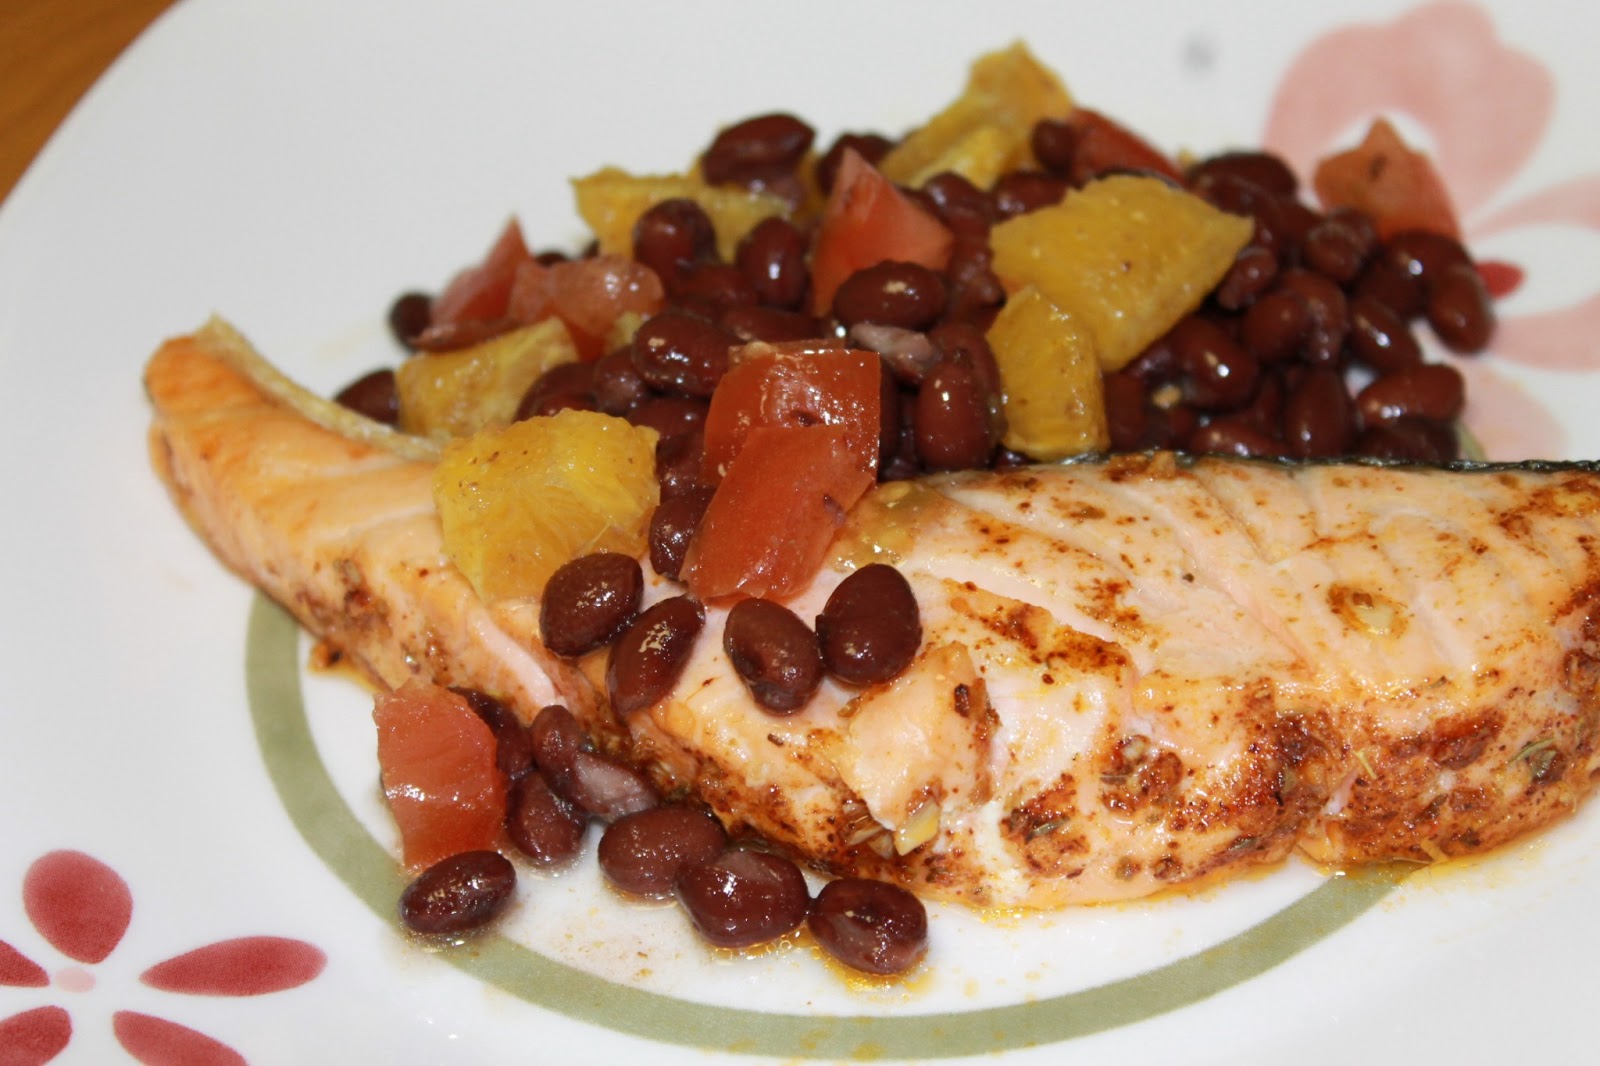
Broiled Salmon with Black Bean Salsa


This dish was delicious and light. I thought that black beans and oranges were going to be weird together, but I was proved wrong. The sweetness of the orange sections cut into the beans, and with the spices you combine with the salsa blends the two together. Summer is on it's way, and with it simple yet tasty new dishes!


Broiled Salmon
Pillsbury Fast and Healthy Cookbook

Ingredients:
Salsa:
1 (15 oz) can black beans, rinsed and drained
1/2 cup diced orange sections
1/2 cup finely chopped tomato
1 tablespoon lime juice
1 teaspoon sugar
3/4 teaspoon cumin

Fish:
3/4 teaspoon chili powder
1/2 teaspoon cumin
1/8 teaspoon garlic salt
1/8 teaspoon ground oregano
2 (8oz) salmon steaks (1 inch thick, each cut into 2 pieces)

Directions:
  1. In medium bowl, combine all salsa ingredients; mix well. Let stand at room temperature for 15 to 30 minutes or refrigerate up to 2 hours to blend flavors. Stir before serving.
  2. Spray broiler pan with nonstick cooking spray. In small bowl, combine chili powder, 1/2 teaspoon cumin, garlic salt, and oregano; mix well. Lightly sprinkle both sides of salmon steaks with chili powder mixture; place on sprayed pan.
  3. Broil 4 to 6 inches from heat for 8 to 12 minutes or until fish flakes easily with a fork, turning once. Serve salsa with fish.
Serves 4
Nutrition: Calories 300; Fat 10g; Protein 31g; Carbs 21g; Cholesterol 75mg; Fiber 7g

Thursday, March 14, 2013

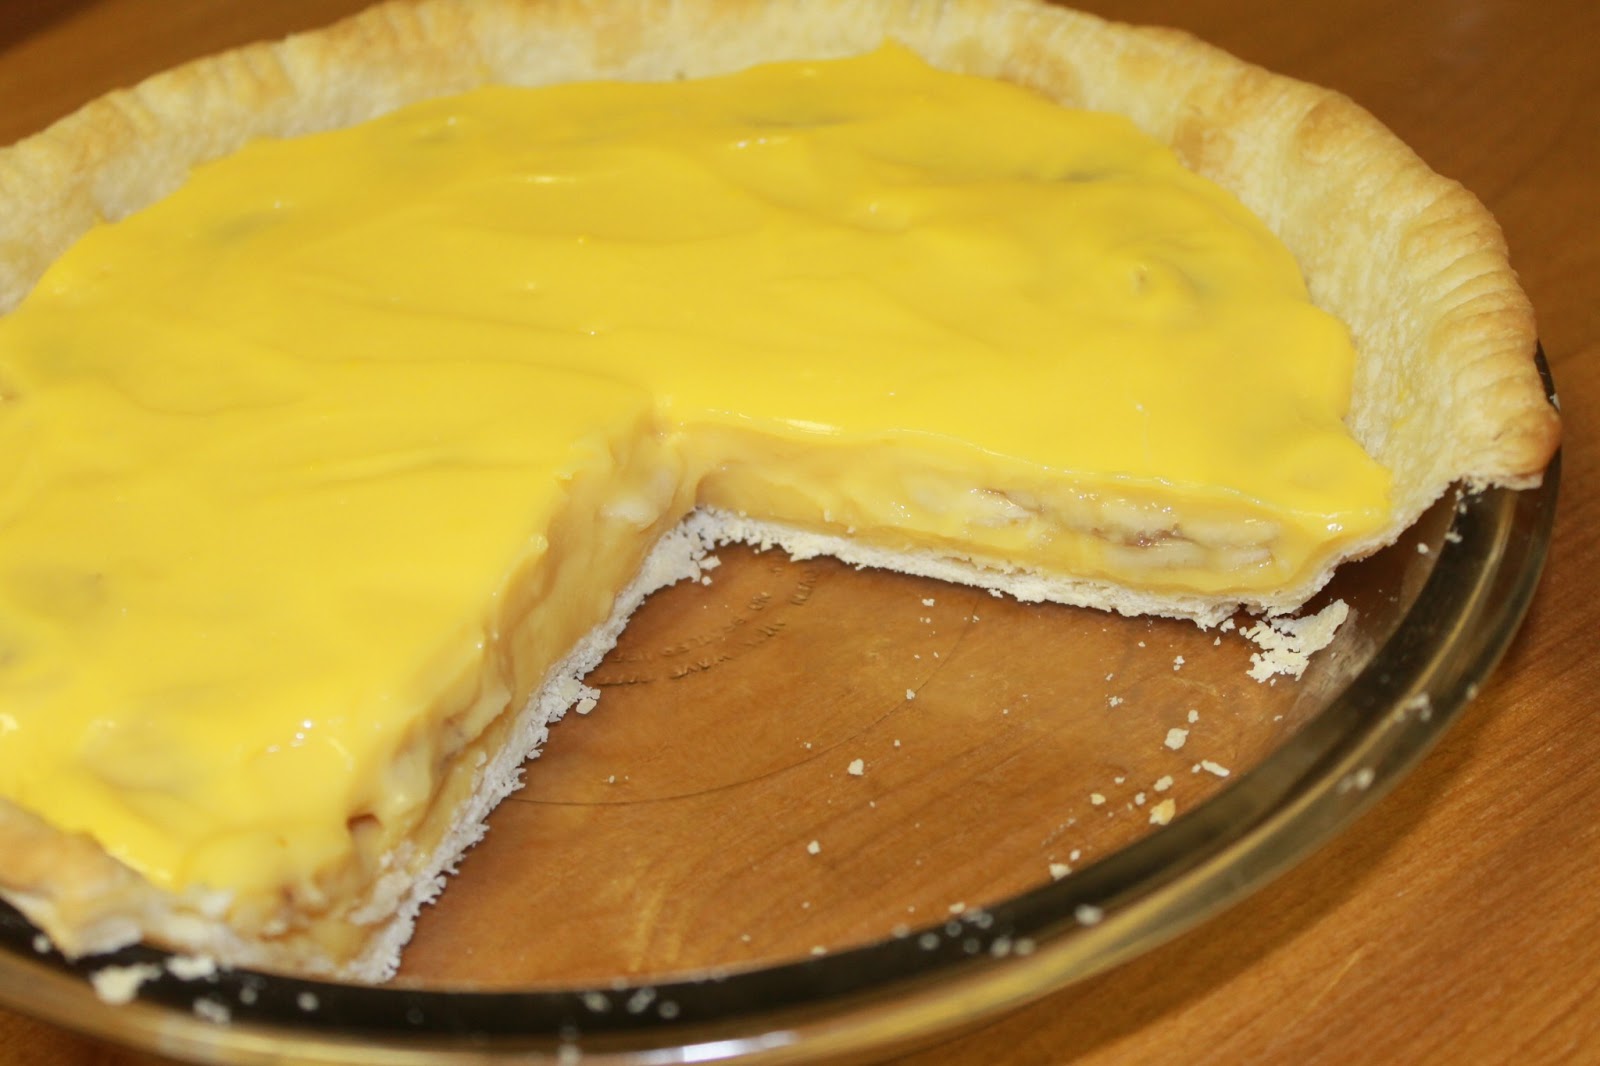
Light Creamy Banana Pie


I am ready for summer! Here in Colorado we keep getting a few days of snow, then some sun, then snow again. This week is supposed to be warm and that makes me happy! I really want to wear my summer clothes, no more jackets please. :)

It's Pie Day! March 14th. 3.14...get it :) So in celebration I posted a great recipe for a quick light dessert pie. Creamy, but not too sweet, and full of bananas. This was so easy, because you could make this hours before dinner and not have to worry about dessert. My husband was a big fan, and so was I!

Happy Pie Day!


Light Creamy Banana Pie
adapted from Light Cooking 

Ingredients:
1 pre-made pie crust, 9-inch
1 can (12-oz) Light evaporated Skimmed milk
1 box (3.4oz) French Vanilla instant pudding and pie filling
1/2 cup plain nonfat yogurt
2 bananas, thinly sliced

Directions:

  1. Bake pie crust as directed on package for empty crust; cool.
  2. In medium bowl, beat evaporated milk, pudding mix and yogurt until mixture starts to thicken. 
  3. Pour half of pudding mixture into cooled crust. Arrange banana slices over pudding mixture; top with remaining pudding mixture. Cover and refrigerate until firm. Garnish with whip topping, if desired.
Serves 8.
Nutrition: Calories 129; Fat 2g; Cholesterol 2mg; Sodium 245mg

Tuesday, March 5, 2013

Light Chicken Fried Rice


I know this may sound weird, but sometimes I get cravings for things I have never tried. Just the other day my husband said he has never heard of that and I'm a little crazy. Which is true. Well, that is what happened when I decided to make Chicken Fried Rice one day. It just sounded really good, even though I never really tried it before. Chinese food is one of my favorite splurges, but I always get white rice because it's definitely healthier. So when I got the random craving for fried rice, I wanted to find a healthy version.

Now that I'm cooking for both my husband and I, our dinners always have to include some kind of meat. I could eat a bowl of just noodles, but my husband likes to have a bit of protein with every meal. So adding the chicken to a bowl of fried rice made it a really nice dinner. Flavorful and filling!


Light and Easy Chicken Fried Rice
iowagirleats.com

Ingredients:
2 cups cooked rice (brown or white rice)
1 chicken breast, cut into bite-sized pieces and seasoned with salt and pepper (I used leftover cooked chicken, just as good)
1/2 cup frozen mixed vegetables
2 green onions, chopped
1 garlic clove minced
1 egg
3 teaspoons sesame or wok oil, divided
2 tablespoons low sodium soy sauce

Directions:
  1. Whisk egg with 1 teaspoon oil in a small dish then set aside.
  2. Heat 1 teaspoon oil in a large work or skillet over medium-high heat. Add seasoned chicken then stir fry until cooked through and removed to a plate. (If using pre-cooked chicken, you can skip this step.)
  3. Heat remaining teaspoon oil in the wok, add frozen mixed vegetables and green onions. Stir fry until tender, about 2 minutes, then add garlic and cook for 30 seconds. Push vegetables to the side of the wok and pour egg mix into the center; scramble the egg. 
  4. Add cooked chicken, rice, and soy sauce to wok then toss well to combine. 
Serves 4
Nutrition: Calories 232; Fat 6g; Protein 18g; Cholesterol 74mg; Carb 25g; Fiber 2g

Friday, March 1, 2013

Tex-Mex Chicken Panini


I am trying really hard to keep up with posting, but time keeps going so fast! I can't believe it's already March. Why couldn't last year gone this fast? One good thing is that I am trying so many new recipes, the bad thing is that I keep forgetting to take pictures and when I do I am lazy about typing up the recipes. Right now I'm busy trying to find a job, but I will try really hard to step up the posting.

Now I caught myself with this recipe, but it was after I started cooking. So as you can see I don't have the ingredient picture. This recipe was super quick and simple. My husband was a big fan of this sandwich so I am certain we will make this again!

The poblano peppers and onions are ready to be roasted.  


Tex-Mex Chicken Panini
adapted from Simply Delicious The Costco Way

Ingredients:
4 cups shredded cooked chicken (about 1 rotisserie chicken)
1 10oz can diced tomatoes with green chilies, drained
1 cup non-fat mayonnaise
3/4 cup chopped fresh cilantro
1 tablespoon minced garlic
Salt and pepper
4-6 sandwich rolls (ciabatta, torta, hoagie...etc)
3 poblano chiles, roasted, peeled, seeded and cut into strips
1 large white onion, cut into 1/4 inch slices, roasted
2 cups shredded Monterey Jack cheese

Directions:

  1. To roast peppers and onions: Preheat oven to 400º. Place whole poblanos and onion slices on a baking sheet. Roast for 20 minutes, or until the onions are tender and the poblano skins are blistered. Remove from oven; place poblanos in a large bowl and cover with plastic wrap. "Sweat" the chilies for 5-10 minutes until cool enough to handle. The skin should peel off easily. 
  2. To assemble panini: In a large bowl, combine chicken, tomatoes, mayonnaise, cilantro and garlic, mixing lightly but throughly. Season to taste with salt and pepper.
  3. Spoon about 3/4 cup of chicken mixture onto the bottom of half of each sandwich roll. Top evenly with poblano strips, onion slices, and cheese. Close the sandwiches.
  4. Grill the sandwiches in a panini press, on medium-high heat, until the bread is toasted and the cheese is melted, about 2 minutes. This could also be done on a skillet over medium heat, turning once, until bread is toasted and cheese is melted.
Makes 6 sandwiches.

Monday, February 11, 2013

Shrimp w/ Tomatoes & Scallion Couscous


So we are getting to our first month here in Colorado Springs and we are still loving it! After getting everything unpacked, well almost everything, our new apartment is really starting to feel like home. It's so nice coming home to our own place and making dinner together. I have been waiting an entire year to make dinner with my better half again! Okay done with the sappy stuff lets get to the food. :)

This is a great light dinner or quick lunch. Shrimp, with tomatoes and a crunchy flavorful bread crumb topping. So easy, yet delicious! We paired it with a mound of scallion coucous, just adding another layer of flavor. If you are in a rush on a weeknight, just get going on this. Takes almost no time at all!


Shrimp w/ Tomatoes & Scallion Couscous
Cookinglight Magazine Jan/Feb 2011

Ingredients:
Shrimp:
1 1/2 cup bread crumbs (or 3oz french bread in processor)
1/2 cup finely chopped fresh parsley
2 garlic cloves, minced
2 tablespoons butter, divided
2 tablespoons olive oil, divided
1 1/2 pounds large shrimp, peeled and deveined
1/4 teaspoon salt, divided
1/4 teaspoon black pepper, divided
2 medium tomatoes, cut into 1/4-in thick slices (about 1lb)
2 tablespoons balsamic vinegar

Couscous:
3/4 cup low-sodium chicken broth
1/2 water
3 green onions, chopped
1 cup whole wheat couscous

Directions:

  1. Preheat oven to 450º.
  2. Combine breadcrumbs, parsley, and garlic. Heat 1 tablespoon butter and 1 tablespoon oil in large skillet over medium-high heat. Add breadcrumb mixture; cook 3 minutes or until golden brown and garlic is fragrant, stirring frequently.
  3. Coat bottom of a 13x9-in baking dish with remaining 1 tablespoon oil. Arrange shrimp in a single layer in bottom of dish; sprinkle with 1/8 teaspoon salt and 1/8 teaspoon pepper. Sprinkle with 3/4 cup breadcrumb mixture; top with tomato slices. Sprinkle with remaining 1/8 teaspoon salt and 1/8 teaspoon pepper. Top with remaining 3/4 cup breadcrumb mixture; dot with remaining 1 tablespoon butter. Bake at 450º for 12 minutes or until the shrimp are done.
  4. While shrimp is cooking, bring chicken broth and water to a boil. Gradually stir in 1 cup couscous; remove from heat and cover for 5 minutes. Fluff couscous with a fork; stir in scallions.
  5. When shrimp are done, drizzle with vinegar. 
Serves 6.
Nutrition: (shrimp w/o couscous) Calories 364; Fat 16.5g; Protein 37.1g; Carb 16g; Cholesterol 274mg

LinkWithin

Related Posts Plugin for WordPress, Blogger...