Monday, November 19, 2012

Pumpkin Biscotti


I can not believe it has taken me this long to make Pumpkin Biscotti! Not only do I love biscotti, but I LOVE pumpkin. No need to fret anymore, because I have finally done what is right. These cookies were a great addition to my morning coffee. A hint of ginger and nutmeg, and a crunch from the pumpkin seeds. I took the white chocolate and just did a little drizzle. If you want to you are more than welcome to just dunk half of the cookie into the melted chocolate. As much as I love chocolate, white chocolate can be a little too rich for me.

These would be a great addition to Thanksgiving breakfast if you plan on a large family gathering. I know I would love it if someone had these sitting out waiting for me to enjoy. :)


The dough is very sticky so just work slowly to get it into the shape you desire.


Pumpkin Biscotti
dessertfortwo.com

Ingredients:
1 large egg
1/2 cup sugar
1/2 teaspoon baking powder
1/4 cup pumpkin puree
1/2 teaspoon cinnamon
1/4 teaspoon ground nutmeg
pinch of ginger
pinch of ground cloves
1/8 teaspoon salt
1/2 teaspoon vanilla
1 1/4 cups flour
3 tablespoons pepitas, lightly toasted
1 ounces white baking chocolate (optional)

Directions:
  1. Preheat oven to 350º and line a baking sheet with parchment paper.
  2. In a medium bowl, beat together with a whisk the egg, sugar, and baking powder. Beat vigorously until the mixture turns pale yellow and falls back in ribbons on itself when you lift out the whisk. 
  3. Next, add the pumpkin puree, cinnamon, nutmeg, ginger, cloves, salt and vanilla. Continue whisking, aerating the mixture. 
  4. Finally, sprinkle the flour on top and fold it in with a spatula. Fold in the pepitas last. 
  5. Shape the dough into a flat log about 3" wide and 8" longs, using wet fingertips. Bake for 40 minutes, or until a toothpick inserted comes out clean.
  6. Remove from the oven, turn the oven down to 300º and let rest for 15 minutes. Slice into 1/2" slices, place them back on the baking sheet and bake another 30 minutes, turning them over half-way. 
  7. Let cool completely on a wire rack. Melt chocolate in a microwave safe bowl at 30 second increments until melted and smooth. Transfer melted chocolate into a small ziplock back and snip a small corner of the bag. Pressing gently from the top drizzle the chocolate over the biscotti. Let cool and serve with your favorite hot beverage!
Makes 12 cookies.
Nutrition: (one cookie) Calories 104; Fat 2g; Protein 2g; Fiber 0g; Cholesterol 15mg; Carbs 20g

Saturday, November 10, 2012

Waist Friendly Butternut Squash Lasagna


Next to pumpkin, butternut squash has always been one of my favorite things. Every fall I look forward to making something new with this fantastic fall ingredient. I love butternut squash ravioli, but that is a bit time consuming, so I had to settle for something a little easier. Lasagna was a close second and I have no regrets. This is a perfect blend of fall flavors, and a great way to get everyone together for a chilly autumn meal. 


It may seem like a lot but it will wilt down. 

I should have put more lemon zest in but I didn't have enough lemons. 

Ooey Gooey cheesiness!! :)


Waist Friendly Butternut Squash Lasagna
singlegirlkitchen

Ingredients:
1 pound whole wheat lasagna noodles
2 to 2.5 pounds butternut squash (cut into 1 in cubes)
olive oil
salt and pepper to taste
4-5 ounces cremini mushrooms, washed and sliced
1 medium onion, chopped
3 cloves garlic, finely minced
1/4 cup white wine
1 cup milk, plus additional if needed
1 teaspoon grated nutmeg
1 tablespoon grated nutmeg
1 tablespoon lemon zest
1 teaspoon minced fresh thyme leaves, plus additional for garnish
1 1/2 cups shredded italian blend cheese

Directions:
  1. Heat the oven to 375ºF. Peel and seed the squash. Cut into 1-inch cubes and toss with 1 tablespoon olive oil and a generous amount of salt and pepper. Spread on a baking sheet and roast for 30-40 minutes or until extremely soft. 
  2. While squash roasts, bring a large pot of water to boil over high heat. Add the lasagna noodles and cooking according to directions on package. When cooked, drain and lay out on clean kitchen towels to dry. 
  3. Heat a drizzle of olive oil in a large saute pan. Turn the heat to medium-high, add onions and cook until tender and fragrant, add mushrooms and 1/4 cup white wine. When mushrooms and onions are tender, and most of the liquid absorbed, push the onions and mushrooms to the sides, turn the heat to medium, and add the garlic and spinach to the center of the pan. Cook until the spinach is wilted, just a few minutes. Turn off the heat and season the vegetables with salt and pepper.
  4. At this point the butternut squash should be out of the oven and cooled slightly. Scrape all the squash into a food processor or blender and add 1/2 cup milk, the nutmeg, lemon zest, and thyme. Puree, adding the remaining milk as you go, until smooth and creamy, but not too thin. (Think thin fruit smoothie) Add salt and pepper to taste.
  5. Lightly grease a 9x13 inch baking dish with olive oil. To assemble the lasagna, spoon about 1/4 of the butternut squash puree into the bottom of the prepared baking dish and spread thinly to coat the bottom. Place 1/4 of the noodles on top (four noodles) and then spread 1/3 of remaining sauce on noodles. Top with 1/2 of the cooked vegetables, and 1/2 cup cheese. Add another layer of noodles, then sauce, then the rest of the vegetables, and 1/2 cup cheese. Place the final layer of noodles over the vegetables and spread the last 1/3 of the sauce over the top. Sprinkle evenly with the remaining 1/2 cup cheese and a pinch of thyme leaves.
  6. Cover the lasagna with foil and back at 375ºF for 30 minutes. Remove the foil and continue to bake for 10 to 15 minutes or until the top is golden and the cheese is gooey. Remove from the oven and let stand uncovered for 5 to 10 minutes before slicing. 
*For leftovers you can cut individual servings, wrap in foil, and freeze in a large freezer bag. Then put straight into oven with foil!

Serves 6 to 8
Nutrition: Calories 233; Fat 7g; Protein 12g; Fiber 6g; Cholesterol 11mg; Carb 34g


Saturday, November 3, 2012

Crispy Baked Buffalo Wings


Tomorrow is Sunday and that means, FOOTBALL!! If you are planning a little gathering of friends, you definitely have to feed them these. I have made wings before, but I could not master the crispy skin when I baked them. Fried wings always gave that crispy skin I wanted, but with tons more calories. Then I found this beautiful method. Taking the time to boil the wings, then broil them is worth it! By seasoning the water, you get a great flavor throughout the meat. Then putting them under the broiler gives them that crispy skin that you could only get by frying...but that was before. No longer do you have to throw your wings in a vat of fatty oil. Just boil and broil. Super simple, and even more delicious!!

I later added a bit of Franks Buffalo Sauce. Great combination of flavors!


You can see the spices from the seasoned water. I think that step is so important, because it doesn't just help get the crispy skin, but gives a full flavor throughout the meat. *Also when broiling make sure to place the oven rack to the second to bottom rung. If the chicken is too close to the broiler you get burnt chicken. You don't want that!


I'm all about the sauce! Who needs ranch dressing or blue cheese when you can just dip it in extra sauce. :)
Crispy Buffalo Wings
adapted from food.com

Ingredients:
2 lbs chicken wings
1 tablespoons chili powder
2 tablespoons red pepper flakes
1 tablespoon salt
1/2 cup Louisiana hot sauce
1/2 cup buffalo sauce (Franks buffalo wing sauce works great)
2 tablespoons unsalted butter

Directions:
  1. Fill a large pot half way with water and then add the first 4 ingredients.
  2. Bring water mixture to a boil and then boil for 15 minutes.
  3. Transfer wings to a baking sheet coated with cooking spray. Place oven rack on second to bottom level. Broil wings for 15 minutes on each side. (For crispier wings, cook longer on each side, maybe 20 minutes per side.)
  4. While waiting for wings, combine sauces and butter in a microwave safe dish and cook in microwave for 2 minutes, or until melted. (For thicker sauce, cook longer.)
  5. When wings are done, toss them with 3/4 of sauce. Use all or use leftover sauce for dipping. 
Serves 4
Nutrition: (6 wings per servings) Calories 405; Fat 30; Carb 0; Cholesterol 119mg; Protein 30g; Fiber 0

Thursday, November 1, 2012

Baked Pumpkin Donut Holes


I am warning you all now, prepare for many pumpkin/squash recipes this fall. The second the winds start to chill and the leaves start to turn I crave pumpkin anything. This recipe came up and I couldn't help but make them. I know I am all about eating healthy, but there are times when I just want to indulge in something sweet and delicious. These are great for those times. :)


Baked Pumpkin Donut Holes
craving chronicles

Ingredients:
1 3/4 cups all-purpose flour
2 teaspoons baking powder
1/2 teaspoon salt
1/2 teaspoon cinnamon
1/2 teaspoon nutmeg
1/2 teaspoon allspice
1/8 teaspoon ground cloves
1/3 cup vegetable oil
1/2 cup brown sugar
1 egg
1 teaspoon vanilla extract
3/4 cup canned pumpkin puree (NOT pumpkin pie filling)
1/2 cup low-fat milk

Coating:
1/2 tablespoon cinnamon
2 tablespoons sugar

Direction:
  1. Preheat oven to 350º. Spray each up in a 24-in mini muffin tin with baking spray or butter generously.
  2. In a medium bowl, whisk together flour, baking powder, salt, and spices (through cloves). In a seperate, large bowl whisk together oil, brown sugar, egg, vanilla, pumpkin, and milk until smooth. Add dry ingredients to wet ingredients and mix until just combined, do not over mix!
  3. Divide batter evenly among muffin cups. Use a tablespoon measure to get uniform sizes. Bake at 350º for 10-12 minutes or until a toothpick comes out clean.
  4. Meanwhile, mix 1/2 tablespoon cinnamon and 2 tablespoons sugar in a small bowl.
  5. Remove muffins from oven and let cool until easy to handle. Roll donut holes in cinnamon and sugar mixture until just coated.*
*The coating was great and really gave the donut holes a sweet crust, but if you are looking for something lighter you can skip it. If you do decide to use the coating, do it on the day you decided to eat them, otherwise the coating tends to get a little moist. One thing I found though was that they were easier to coat when warm. 


Saturday, October 27, 2012

Beef Daube Provencal


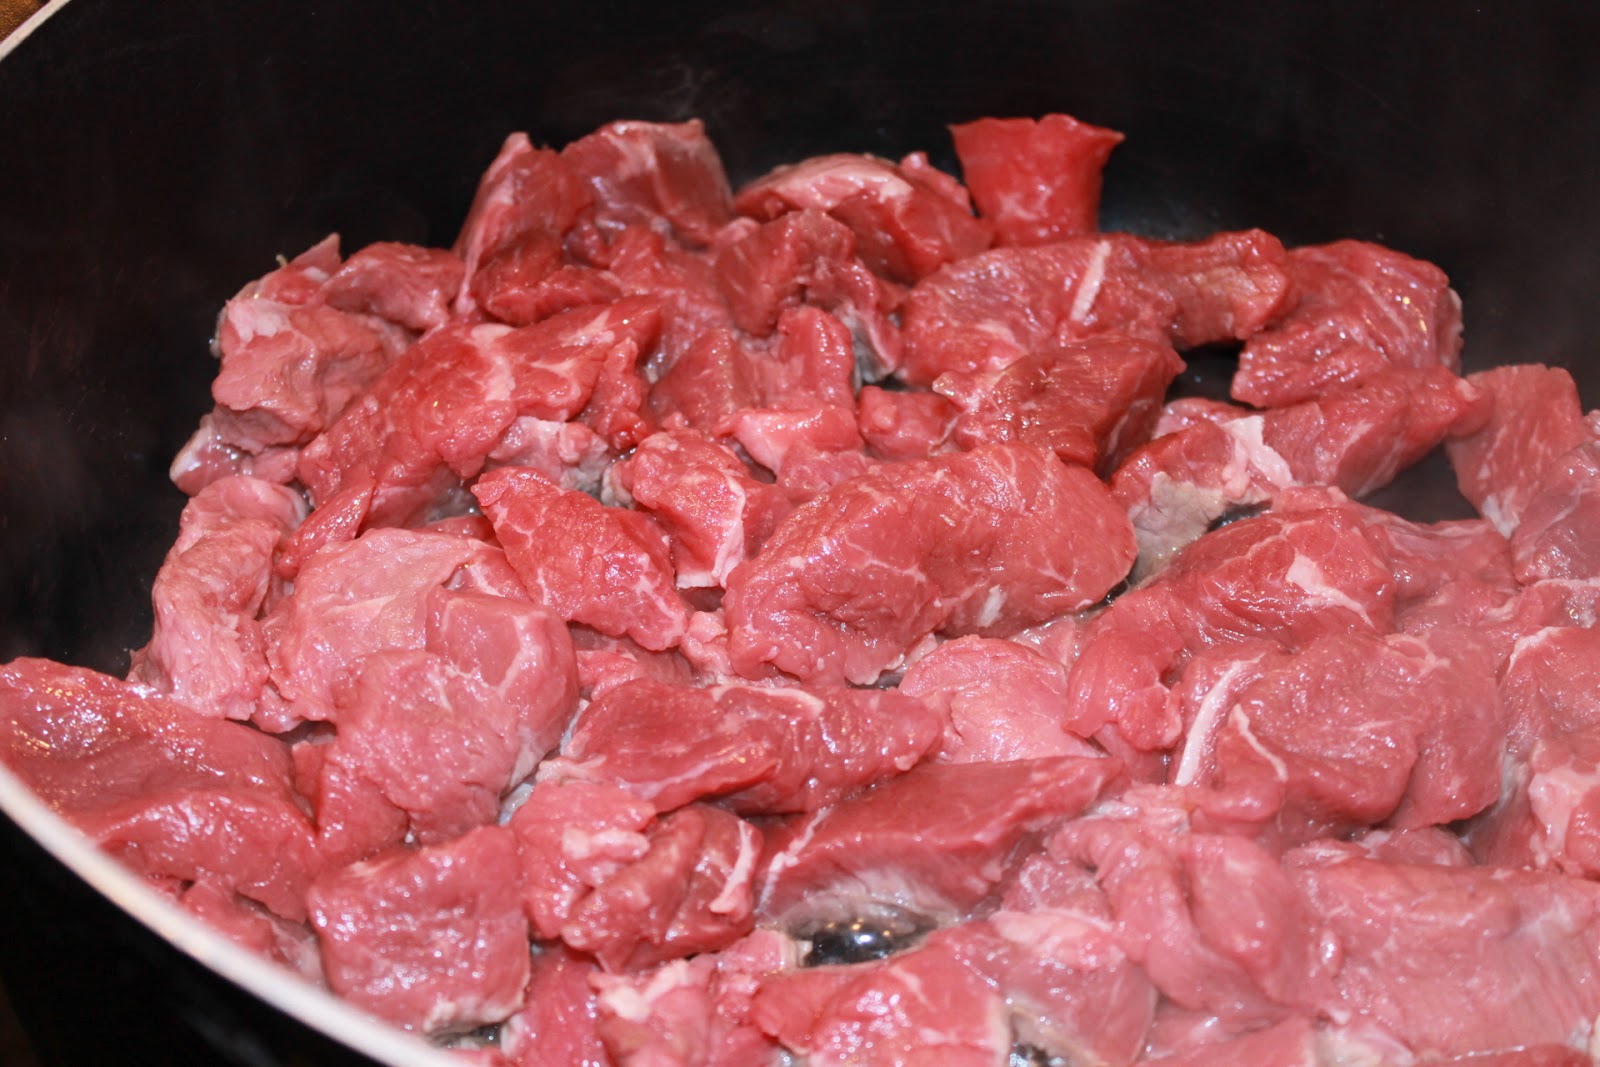
Now if you do not call this recipe perfect fall comfort food then I don't know what your description of comfort food is. I prepared this with my crock pot. I will use any excuse to use my crock pot really. My house started to smell great and I couldn't want to eat dinner, even when it was 4 hours away. The wine gave the beef such a full rich flavor, and paired beautifully with the fresh herbs.

I may not be able to pronounce the name of this recipe, but I will gladly eat it everyday. :)


Beef Daube Provencal
CookingLight 

Ingredients:
2 teaspoons olive oil
12 garlic cloves, crushed
1 (2 lbs) boneless chuck roast, trimmed and cut into 2-in cubes
1 1/2 teaspoons salt, divided
1/2 teaspoon freshly ground black pepper, divided
1 cup red wine
2 cups chopped carrots
1 1/2 cups chopped onion
1/2 cup less-sodium beef broth
1 tablespoon tomato paste
1 teaspoon chopped fresh rosemary
1 teaspoon chopped fresh thyme
Dash of ground cloves
1 (14 oz) can diced tomatoes
1 bay leaf
3 cups cooked medium egg noodles (about 4 cups uncooked)

Directions:
  1. Preheat oven to 300º. (If using slow cooker, skip this step and do not preheat oven.)
  2. Heat oil in a small dutch oven over low heat. Add garlic; cook 5 minutes or until garlic is fragrant, stirring occasionally. Remove garlic with a slotted spoon, and set aside. Increase heat to medium-high. Add beef to pan; sprinkle with 1/2 teaspoon salt and 1/4 teaspoon pepper. Cook 5 minutes, browning on all sides. Remove beef from pan. Add wine to pan; bring to a boil, scraping pan to loosen browning bits. Add garlic, beef, 1 teaspoon salt, 1/4 teaspoon pepper, carrot, and next 8 ingredients (through bay leaf), and bring to a boil. 
  3. If baking; cover and bake at 300º for 2 1/2 hours or until beef is tender. Disgard bay leaf. Serve of noodles.
  4. If using slow cooker; prepare through step 2. Place beef mixture in an electric slow cooker. Cover and cook on high for 5 hours.
Serves 6.
Nutrition: Calories 367; Fat 12.8g; Protein 29.1g; Carb 33.4g; Fiber 3.9g; Cholesterol 105mg

Thursday, October 25, 2012

Tiramisu Coffee Dessert


When I was growing up I had no idea what tiramisu was. Even when I started drinking coffee I had no idea what this decadent dessert was like. Then one day some told me it tasted like coffee, and I was stunned that I have never tried it before. I had my first bite and I have been hooked on this sweet, espresso dessert.  There are many versions of this dish and I was happy to come across such a simple recipe, I just had to try it out. I cut the recipe in half as it was only my mother and I who would enjoy this, and it really took almost no time at all, with hardly any calories! No turning on your oven, and you really only need one mixing bowl. Who wouldn't want to make this?! :)


Next I make this I will only drizzle the coffee over the top of the angel food cake. I poured some on the bottom thinking it would soak all the way through. Nope, it all just puddled on the bottom and it was a bit soggy, while the top was nice and firm. 


Tiramisu Coffee Dessert
Betty Crocker's Healthy New Choices

Ingredients:
1 loaf (9x5 inches) angel food cake, cut into 8 slices
1 cup strong coffee (room temperature)
1 package (8 oz) reduced-fat cream cheese, softened
1/2 cup sugar
1/2 cup sugar free chocolate syrup
1 container (8 oz) frozen fat-free whipped topping, thawed (3 1/4 cups)
Baking cocoa

Directions:
  1. Arrange cake slices to cover bottom of rectangle baking dish, 13x9x2 inches. Drizzle coffee over cake.
  2. Beat cream cheese, sugar, and chocolate syrup in large bowl with mixer on medium speed until smooth. Gently fold in whipped topping until well blended. Spread over cake.
  3. Cover and refrigerate about 1 hour or until set. Sprinkle with cocoa before serving. Cover and refrigerate any left overs. 
Serves 15.
Nutrition: Calories 185; Fat 7g; Cholesterol 10mg; Carb 28g; Protein 3g;  Fiber 0g

Tuesday, October 23, 2012

Light Chicken Pot Pie


The colder it gets outside the more time I want to spend in the kitchen cooking tons of comfort food. We recently bought some pumpkin spice candles and the house has smelled so good. Everytime I walk downstairs I want to cook everything with pumpkin or butternut squash. I'm starting to realize that fall is becoming my favorite season. The changes of the leaves, the delicious seasonal foods, and the great clothes! I find that my closet isn't as great in the summer time, and all I want to do is wear scarves and boots. Of course if I did that in the middle of summer I would probably be very uncomfortable.

I have been looking at this specific recipe for almost two years now. It came in one of my many cooking magazines and since the day it arrived in my mailbox I have had it flagged. For some reason I have been to scared to make it. Now come on, you have to admit making chicken pot pie seems a little daunting and scary. There are lots of ingredients and it does take a little bit of time, but I have found that it is definitely worth it. I got all my ingredients together the morning of, and I set about two hours aside to prepare. The only thing I have to say is make sure you don't over pour the chicken mixture into your baking dish. I wasn't paying attention and for some reason I ending up with a dish full to the brim and a counter covered in sauce. Instead of throwing away the extra, I stored it in my fridge and just ate it like I would chicken soup. Who doesn't like a little bit of left overs? Now make sure to put your dish on a baking sheet while in the oven. I compelety forgot and I came back to find the sauce boiling a little and dripping down onto the oven coils. Was not fun watching little flames shooting up from the bottom. Thankfully I caught it just in time, but please do yourself a favor and save the clean up by using a baking sheet.


Light Chicken Pot Pie
CookingLight

Ingredients:
Crust:
1 cup all-purpose flour, plus more for dusting
1/4 teaspoon baking powder
1/4 teaspoon cold unsalted butter, cut into small cubes
1 large egg
2 tablespoons milk

Filling:
2 small russet potatoes
4 1/2 cups low-sodium chicken broth
5 medium carrots, cut into large chunks
1 to 2 teaspoons chopped fresh thyme
2 tablespoons extra-virgin olive oil
1 large onion, finely diced
3 tablespoons flour
1/3 cup milk
3 stalks celery, sliced
3 cups shredded rotisserie chicken, skin removed
1/2 cup fat-free plain greek yogurt
1 cup frozen peas
1/2 cup minced fresh parsley
salt and pepper

Directions:
  1. Prepare the crust: Pulse flour, baking powder and salt in a food processor until combined. Add the butter, one piece at a time, pulsing until the mixture looks like coarse meal. Separate the egg; refrigerate the egg white. Beat the egg yolk and milk in a bowl, then add to the food processor, pulsing until the dough comes together. Turn out onto a lightly floured surface and gather into a ball. Flatten into a disk, wrap in plastic wrap and chill at least 1 hour. 
  2. Meanwhile, make the filling: Preheat the oven to 425º. Prick the potatoes with a fork and bake directly on the oven rack until tender, about 45 minutes. Cool slightly, then peel and break into small pieces. 
  3. Bring the chicken broth, carrots and thyme to a simmer in a small saucepan over medium heat and cook 2 minutes; cover and keep warm. Meanwhile, heat the olive oil in a large pot over medium heat. Add the onion and cook until soft, about 8 minutes. Sprinkle in the flour and stir until lightly toasted, about 3 minutes. Add the milk, celery, potato pieces and the warm broth mixture and simmer until thickened, about 15 minutes. Remove from the heat and stir in the chicken, yogurt, peas and parsley. Season with salt and pepper. 
  4. Transfer the filling to a 2-qt casserole dish. Roll out the dough on a lightly floured surface until about 1/8 in. thick and slightly larger than the dish. Beat the reserved egg white in a bowl; brush over the dough and season with salt and pepper. Press the dough against the sides of the dish. Place on a baking sheet and bake until the crust is golden brown, 20-25 minutes.
Serves 6.
Nutrition: Calories 482; Fat 19g; Cholesterol 137mg; Sodium 795mg; Carb 47g; Fiber 5g; Protein 31g

LinkWithin

Related Posts Plugin for WordPress, Blogger...