Sunday, February 19, 2012

Soy Chorizo Breakfast Scramble


I have been on a real Trader Joe's kick this last week or so. I believe I walked into that store 3 different days this week. Not only are the prices a bit better than the big stores, their food is natural and healthy. I love going in and seeing all of the natural, organic, and local ingredients. My kitchen is full of whole wheat and soy products right now! Which is different, because I don't even know when I have had anything soy before. I always compare nutrition before I buy things like this, because sometime it can say "soy", "organic", "guilt-free" and still not be that much better for you. So I always spend forever looking at one product in that store. It's crazy how awesome it is, and today it just got even more awesome!

Now as you have seen from my previous recipes, I eat meat. Mostly poultry, and not that much red meat. Don't get me wrong, if see a good filet mignon or new york steak on the grill I'm all for it. Put that on a plate with some roasted potatoes and I'm good to go. But there are those meat products that are definitely on my do-not-touch list. For example, Chorizo. If you have ever had chorizo you know how delicious it is, and how bad it can be for you. My mom always made us chorizo for breakfast. I remember waking up in the mornings and smelling it, oh man how delicious those days were. Then as I got older and started eating healthy I learned what was in chorizo and decided to back off. I haven't had any for almost 2 years. There would be days when I would crave a good chorizo burrito, but I knew I couldn't go there. That door was closed. Then yesterday happened! 

As I was walking through Trader Joe's I spotted this:
Look at it's beauty!
I was very skeptical and studied the packaging for a few minutes. I couldn't decide if I should try it, I was afraid it wouldn't taste anything like the real stuff. So, thanks to modern technology, I took out my phone and looked up reviews on the product I had in my hands. The reviews were great. People said it tasted the same, had a great hint of spice, and that it was amazing. Even though the reviews were all good, I still wasn't sure, but I went to buy it anyways. On my way out I stopped a worker at the store and asked her opinion, she said it was delicious. I felt a bit more confident about buying it. As I was checking out the cashier asked what I was going to make, I said a breakfast scramble and then proceeded to ask him what he thought of this meatless product. He said he loved the real thing, and this was just as good. Okay, I was feeling a lot better. So I planned my breakfast.

This morning I was excited, because I haven't had chorizo in so long. Of course I was still nervous, but as I removed the casing from the chorizo, it smelled exactly like the real stuff. That was when I knew I had opened a door to one that I closed so long ago. I can now enjoy one of my favorite dishes without feeling guilty about the calories and fat. Now, if only I can stick to one serving and not eat the whole pan by myself. :)

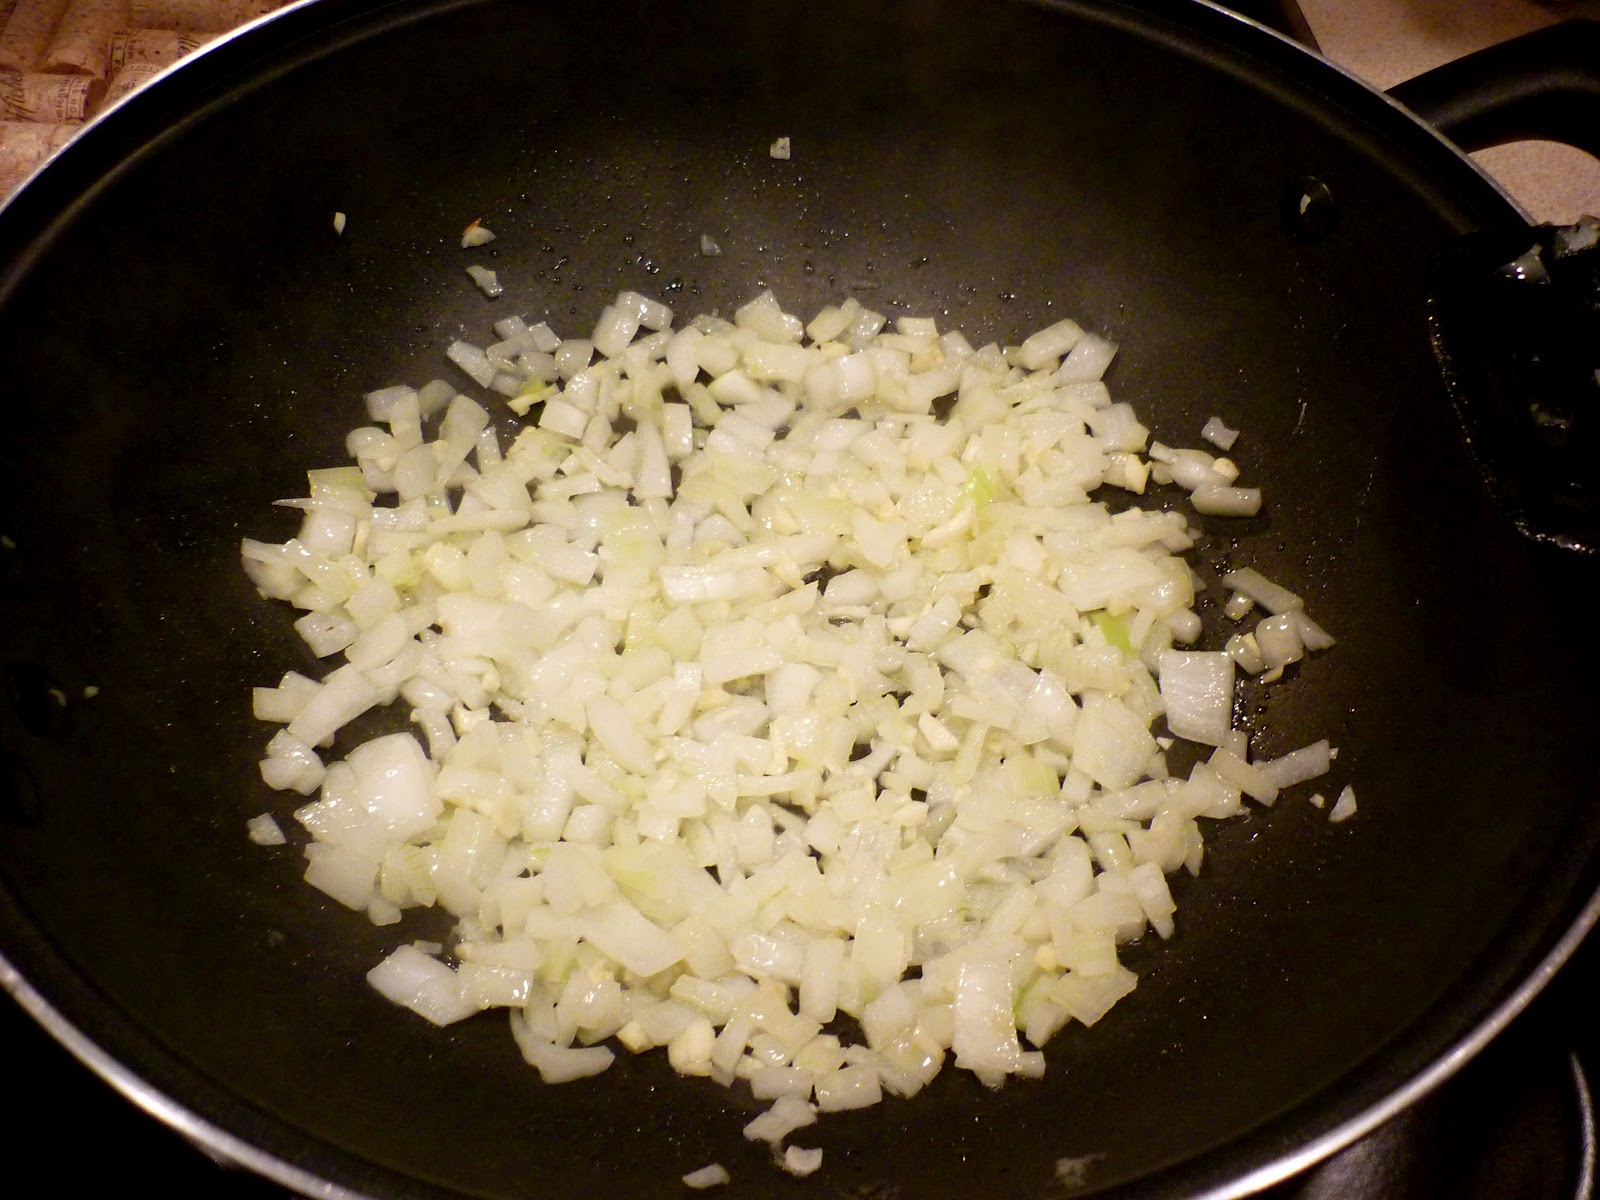
This is pretty much the base, eggs and chorizo. You are welcome to add whatever else you like. I have seen recipes that had potatoes, peppers, mushrooms...the possibilities are endless! As you will see I had an onion on hand so I used that. If I had jalapenos or bell peppers in my fridge those would have been in that pan too. 

Do not over mix the eggs. You want them to be a little separated before going into the pan. 

I bought this olive oil at Pike Place Market in Seattle. You can use regular extra virgin olive oil if that is what you have.  I had this, which was a fortunate thing! Sotto Voce is the Washington based company that makes infused oil and vinegar. I plan on getting more in the future, their products are delicious!


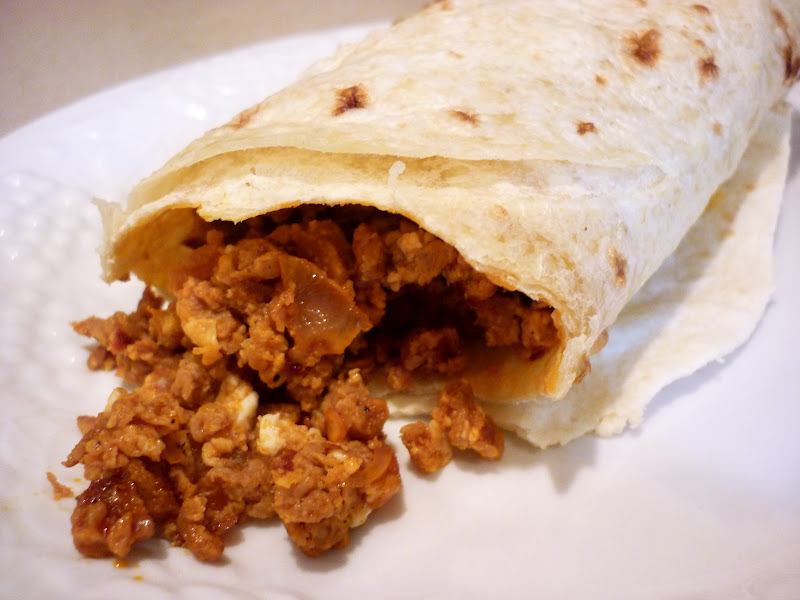
Hello, Delicious! 

Soy Chorizo Breakfast Scramble

Ingredients:
1 tbs olive oil
1/4 of a large onion, diced (optional)
12 oz Soy Chorizo (Trader Joe's version is delicious!)
2 tsp red pepper flakes
2 large egg whites
2 large eggs
salt and pepper to taste
Flour or Wheat tortillas (optional)

Directions:
  1. Heat oil in large non-stick skillet on medium-high heat. When pan is hot, add onion and cook for 1-2 min. 
  2. Remove casing from chorizo and add to pan. Stir to crumble, cook for 3-4 minutes until heated through. Add a little bit of salt and pepper to taste. 
  3. Combine eggs and egg whites in separate bowl (do not over mix). Add eggs and red pepper flakes to chorizo mix. Cook for 3-4 minutes, stirring occasionally to make sure the eggs mix well with chorizo. When mixture starts to brown remove from heat, cover with a lid to keep warm. Serve as desired.
  4. If using, place tortillas on a microwave safe plate and heat for 30 seconds, until pliable. Place about 1/2 cup chorizo mixture on tortilla and roll into a burrito.
Makes 6 servings.
Nutrition: (per serving - not including tortilla) Calories 165; Fat 12g; Carbs 7g; Protein 11g; Cholesterol 57mg; Sodium 623mg; Fiber 3g

Friday, February 17, 2012

Baked Turkey Rotini


I have been on a cooking frenzy the past few weeks, and I don't mind it! Ever since I started this blog almost a year ago I have learned so much. If it is possible, I think I love cooking even more. I love the fact that I can take a recipe and switch it up to how I want it. It makes me feel confident about my cooking abilities. 

With this recipe I pretty much changed everything and even added my own things. The base of the recipe is from Eat Yourself Skinny, a new food blog that I found and love. The recipe was great, but I ended up going my own direction when I started cooking. I had been craving a good pasta bake recipe and when I found this I was set. I decided that I needed to add a bit more flavor, and adding just a few spices really changes a recipe. 

When I went shopping I was looking for rigatoni, what the original recipe called for, but I couldn't find a whole wheat/grain rigatoni. So I went a different direction when I spotted that little green box. A good way to make pasta dishes healthy is to go for the Garden Delight Ronzoni pastas. Certain portions have a full serving of vegetables and I think that is delightfully sneaky! Especially if you have kids, this is a great way to give them their daily vegetable servings without them knowing it. I love it!


Baked Turkey Rotini
Adapted From Eat Yourself Skinny


Ingredients:
1 tbs olive oil
2 cloves of garlic, minced
1/2 medium onion, chopped
4 cups tomato sauce
1 lb ground lean turkey
1 tsp oregano
1 tsp dried oregano
1 1/2 tsp red pepper flakes
2 1/2 cups uncooked rotini
1 1/2 cups (6 oz) shredded fat-free mozzarella cheese, divided
Cooking spray
1/4 cup grated fresh Parmesan cheese 

Directions:
  1. Cook 2 1/2 cups rotini as instructed by package, omitting salt, until just al dente.
  2. Preheat oven to 350º.
  3. Heat olive oil in medium-high heat. Add onions and garlic until fragrant, 2-3 minutes. 
  4. Add ground turkey and cook until browned; stirring to crumble. Drain well.
  5. Combine turkey, rotini, tomato sauce, and 1 cup mozzarella in an 11x7in. baking dish coated with cooking spray. Top with 1/2 cup mozzarella and grated Parmesan. 
  6. Bake at 350º for 20 minutes or until thoroughly heated.
Makes 8 servings.
Nutrition: Calories 377.5; Fat 16g

Sunday, February 12, 2012

Tender Chicken Nuggets


This week has been a rough one for me. I was sick for a few days and couldn't get a day off, so I had to go into work and sweat through the nausea and cough. Not fun. Although it wasn't something that a lot of Emergen-C and orange juice couldn't fix. So I was good in a few days. Of course I had to lay off of the cooking, but it's a good thing I have a stock pile of recipes growing!

These are a great fast and healthy snack. They could be for your kids, or just the little kid inside of you. No matter how old we get, chicken nuggets always bring us back to those days when we had nothing to worry about other than which toy to play with that day. Besides, who wouldn't want these over those frozen things you get at the store, or the greasy ones from fast food joints? Personally, I would gladly go through the extra effort to get a delicious and nutritious snack. For my dipping sauce I combined a little BBQ sauce and hot sauce. Both were Chipotle, purely coincidence, but a fortunate one at that. This snack, or light lunch, is great because you can season it how ever you want, and dip it in anything that sounds good! :)


The recipe mentioned using a plastic bag to easily coat the chicken, but I didn't have one that was big enough, so I resorted to a large bowl.

My own little recipe. I like things spicy, and I just couldn't resist adding a little heat to these yummy nuggets! So I added just a few drops of hot sauce into my choice of dipping sauce.


Tender Chicken Nuggets

Ingredients:
1/2 cup seasoned bread crumbs
2 tablespoons grated Parmesan cheese
1 egg white
1 pound boneless skinless chicken breasts, cut into 1-inch cubes

Directions:
  1. Preheat oven to 400º.
  2. In a large resealable plastic bag, combine the bread crumbs and Parmesan cheese. In a shallow bowl, beat the egg white. Dip chicken pieces in egg white, then place in bag and shake to coat.
  3. Place in a 15-in. x 10-in. x 1-in. baking pan coated with cooking spray. Bake, uncovered, at 400º for 12-15 minutes or until chicken is no longer pink, turning once. 
Makes 4 servings
Nutrition: (6 nuggets) Calories 194; Fat 3g; Cholesterol 68mg; Sodium 250mg; Carb 10g; Protein 30g

Tip: The chicken breasts are easier to cut if they are partially frozen. Also, if you would like to add any type of seasoning (red pepper flakes, cumin, Italian spices...etc) add them to the bread crumbs, to your preferred taste, before coating the chicken

Thursday, February 9, 2012

Banana Nut Cheerio Treats


As you may have noticed, Valentine's day is right around the corner. Have you got dinner planned? The flowers ready? Well, my valentine is a whole ocean away, so the only way I could celebrate was to make some delicious treats and send them his way. A week or so ago I sent off a care package with some goodies, including these crazy delicious snacks! 

I was thinking of making rice krispy treats and I found a lot of good recipes, but I wanted something a little more healthy. Some recipes had corn flakes, or brown rice crispies. Then I got to thinking. Cheerios! No, wait...Banana Nut Cheerios! So I looked around at different recipes and got a few ideas. In the end, this recipe was all my creation. Lets say I was experimenting, and the result was delicious. Instead of marshmallows I decided to try out peanut butter and honey. They are sweet and help keep the treats from falling apart. You could really use anything in place of the cheerios, but I thought the banana flavor would go great with peanut butter. Of course I added a few chocolate chips! They melted a little because I added them too soon after I took the pb and honey mix off the stove, but it caused no damage. Still delicious. See what happens when you take risks? Yummy things appear in front of you, sometimes. :)


At this point you could cut them into squares or use a shaped cookie cutter. I would suggest using parchment paper, it makes it easier to remove from the dish.


Banana Nut Cheerio Treats

Ingredients:
6 cups Banana Nut Cheerio cereal
2/3 cup peanut butter
2/3 cup honey
1 tsp vanilla 
1 tsp cinnamon

Directions:
  1. Measure cereal into large bowl. Set aside.
  2. Melt peanut butter and honey in non stick sauce pan, stirring frequently.
  3. Add cinnamon and vanilla, blend well.
  4. Combine with cereal in separate bowl.
  5. Press into large casserole dish sprayed with cooking oil or lined with parchment paper. (the larger the dish the thinner treats will be).
  6. Place in fridge for 10 minutes. 
  7. Carefully take mixture out of dish and cut into squares or use a cookie cutter and cut into shapes. (If the mixture will not come out, like mine, you can cut them in dish. I should have used parchment paper.)

Sunday, February 5, 2012

Chocolate Chocolate-Chip Biscotti


Today is one of the best days of the year! The day we can all get together, watch football, drink, and eat as many wings as we can. I enjoy the fact that the day is full of appetizers. Wings, chips and salsa, Cheese Queso, hot dogs, etc. Finger foods are always the best. Today I am sitting at home with my mom and grandma watching the game. I know, I'm exciting! So since it was only going to be a few of us, I didn't want to make a lot. I resorted to one snack that I plan on making a half hour before the game. Of course this biscotti is not what I made! I will post that recipe a little later. 

I have been on a biscotti kick for some reason. Ever since I made my Gingerbread Biscotti I have wanted to keep my cookie jar filled with these delicious little cookies. My morning coffee is much more exciting now. This recipe is great because it's chocolate chocolate! So good dipped in hot chocolate or coffee. When you make biscotti you are in control of how crunchy or soft you want them. The crunchier, the longer you bake the second time. I baked mine much longer than the recipe asked and it was still softer than I wanted. Of course, they are delicious either way so I was not against eating them. It is great because the hot coffee softens the chocolate chips and makes them all melty! Yum! 


This is normal sugar!

Place it in a food processor, blender...whichever you have. Pulse for about 30 seconds.

You should now have superfine sugar. It's not as fine as powdered sugar, but more in between.


Chocolate Chocolate Chip Biscotti
Gina's Skinny Taste


Ingredients:
1 2/3 cup all-purpose flour
1/2 cup good quality unsweetened cocoa powder
1 1/2 tsp baking powder
pinch of salt
3/4 cup superfine sugar (you can put sugar in food processor)
3/4 cup dark chocolate chips
2 large eggs
1 large egg white

Direction:
  1. Preheat oven to 375º. Line baking sheets with parchment paper.
  2. Combine flour, cocoa powder, baking powder, salt, and sugar in a large bowl. Add chocolate chips and mix. Gradually add eggs and egg whites to the mixture and combine to make a dough. (If dough is too dry add one more egg white.)
  3. Divide the dough into two or three loafs. Place on the lined baking sheet and bake 20 minutes. When cool enough to handle, gently cut the loaves on an angle into 1/2 inch slices (a serrated knife works good for this).
  4. Return to the baking sheets fitting as many as you can. You may need to do this in batches. Bake the biscotti for another 3-4 minutes on each side. (less time if you like it softer)
Makes around 24
Nutrition: (per cookie) Calories 100.9; Fat 2.9g; Carb 18.2g; Fiber 1.1g; Protein 1.9g

Tuesday, January 31, 2012

Waistline-Friendly Turkey Chili


I know many of us are looking forward to that first day of spring, I definitely am. Well, unfortunately it's still winter and we still have to deal with the cold. Here it's been chilly, but the sun has made a comeback in the last week or so. It makes me want summer to come even faster! So to make my chilly winter days go faster I throw some ingredients in a crock-pot, sit back, and let the aroma of chili warm me up. :)

What's better than a bowl of steaming delicious chili to heat up those cold nights? Nothing! Well, maybe a nice mug of hot chocolate and a fire place, but those don't count right now. I was really craving chili and the huge snow storm was on it's way. So since I was stuck in the house, I just set up the crock-pot and 8 hours later I had a hot bowl of chili in front of me. Not only can you make chili super healthy, but it's so easy to make. The pot does pretty much all of the cooking for you. That is why chili is one of the best meals in the world. :)

I do warn you, if you are sensitive to spicy then I would alter the recipe a little so it's more to your liking. The flavor isn't too strong, but I know some people that would push the bowl aside. Now, if you love the spice, then I would add a jalapeno or haberno into the mix. 


The recipe was originally prepped on the stove top, but I like my crock-pot so I went in a different direction. If you don't have 8 hours, then you are more than welcome to use the stove. Both methods are in the directions for you. :)


Waistline-Friendly Turkey Chili
allrecipes.com


Ingredients:
1 pound ground turkey
1/2 cup diced onion
1 clove garlic, minced
1/2 cup diced green bell pepper
1/2 cup diced red bell pepper
1 (14.5 ounce) can diced tomatoes
1 cup medium salsa
1 cup chipotle barbeque sauce
1 (4 ounce) can chopped green chilies
1 cup corn kernels
1 (15 ounce) can black beans, rinsed and drained
1 tablespoon lime juice
1 teaspoon ground cumin
1 tablespoon crushed red pepper flakes
1 tablespoon chili powder
1 tablespoon dried cilantro
1/2 teaspoon salt
1 cup fat-free sour cream, for garnish (optional)

Direction:


In crock-pot:
  1. Heat large, nonstick pot over medium heat and stir in the ground turkey, onion, garlic, green pepper, and red pepper. Cook and stir until turkey is crumbly, evenly browned, and no longer pink; about 10 minutes. 
  2. Meanwhile, pour tomatoes, salsa, barbeque sauce, green chilies, corn, and black beans into crock-pot. Add cooked turkey mixture to crock-pot. Season with lime juice, cumin, red pepper flakes, chili powder, and cilantro. Stir to combine. Cover and cook on high for 4 hours, or low for 8 hours. Check occasionally to stir.
  3. Serve with a dollop of sour cream if desired. 


Over stovetop:
  1. Heat large, nonstick pot over medium heat and stir in the ground turkey, onion, garlic, green pepper, and red pepper. Cook and stir until turkey is crumbly, evenly browned, and no longer pink; about 10 minutes. Pour in tomatoes, salsa, barbeque sauce, green chilies, corn, and black beans. Season with lime juice, cumin, red pepper flakes, chili powder, and cilantro. Bring to a simmer over medium-high heat, then reduce heat to medium-low, cover, and simmer until flavors develop, 1 to 3 hours. Serve with a dollop of sour cream on each serving.
Makes 8 servings.
Nutrition: Calories 212; Fat 5.1g; Cholesterol 47 mg; Sodium 1030mg; Carbs 27g; Protein 15.5g; Fiber 3.1g

Friday, January 27, 2012

Banana Bread


I have wanted to make banana bread for so long! I discovered it's deliciousness only a little over a year ago, and since then I have wanted to make my own. Yes I have gone to the store and used the boxed quick bread, but that doesn't count as making it from scratch. My only problem was that I was too impatient to wait for the bananas. There were a few bananas I had that were at the perfect ripeness, but I got busy and didn't get to them before they went bad. I should have put them in the freezer till I had the time. Well, I didn't so I had to wait once more for bananas to get to that perfect point. A few days before I made the bread I bought three bananas specifically for this reason. I looked online on how to quickly ripen bananas and I found the brown bag trick. You know what I'm talking about. You place the bananas in a brown paper bag with a tomato or apple, and the bananas should ripen within 24 hours or so. Well, I don't know what I did wrong but nothing happened to those bananas. I kept them in that bag for almost 2 days and, nothing. So I found another method online. If you place your bananas in a oven preheated to 300º for 10 minutes they should blacken. While they definitely blackened. This method brings all the natural sugar forward and gives the fruit a more sweeter taste. Even though this method sounds odd, the bread turned out great. I tasted nothing wrong. I'm sure if you just waited for the bananas to get there on their own, the bread would be even more delicious!


Banana Bread
Cooking Light Complete Cookbook


Ingredients:
1 cup all-purpose flour
3/4 teaspoon baking soda
1/2 teaspoon salt
1 cup sugar
1/4 cup butter, softened
2 large eggs
1 1/2 cups mashed ripe banana (about 3 bananas)
1/3 cup plain low-fat yogurt
1 teaspoon vanilla extract
Cooking spray

Directions:

  1. Preheat oven to 350º
  2. Lightly spoon flour into dry measuring cups, level with a knife. Combine flour, baking soda, and salt; stirring with a whisk.
  3. Place sugar and butter in a large bowl, and beat with mixer at medium speed until well blended (about 1 minute). Add eggs, 1 at a time, beating well after each addition. Add banana, yogurt, and vanilla; beat until blended. Add flour mixture; beat at low speed just until moist.
  4. Spoon batter into an 8x4 inch loaf pan coated with cooking spray. Bake at 350º for 1 hour or until a wooden pick inserted in center comes out clean. Cool 10 minutes in pan on wire rack, remove from pan. Cool completely on wire rack. 
Makes 14 servings
Nutrition: (1 slice) Calories 187; Fat 4.3g; Protein 3.3g; Carb 34.4g; Fiber 1.1g; Cholesterol 40mg


LinkWithin

Related Posts Plugin for WordPress, Blogger...