Saturday, December 17, 2011

Whole Wheat Penne with Broccoli and Sausage


For the next three weeks, posts will be a bit staggered. My husband came home after seven months training for the military, and I will be revisiting recipes more than getting new ones. He looked through some older posts and wants to try some. :)

This pasta I made a few weeks ago and has been sitting in my drafts folders. I kept meaning to put it up but things like fudge got in the way. I really liked this pasta. It was simple, quick, and great flavor. My favorite part was the lemon. Even with such little amount of citrus, you could definitely taste the difference. I couldn't get any nutritional information on this dish, but I can tell you it is pretty healthy. Choose a whole grain or whole wheat pasta, and go for the lean meat. The cheese of course is optional, but you deserve to splurge once in a while!

Hope your holidays are going great and I wish you Happy Holiday Cooking! :)


Whole Wheat Penne with Broccoli and Sausage
cooking for le$$ Pasta

Ingredients:
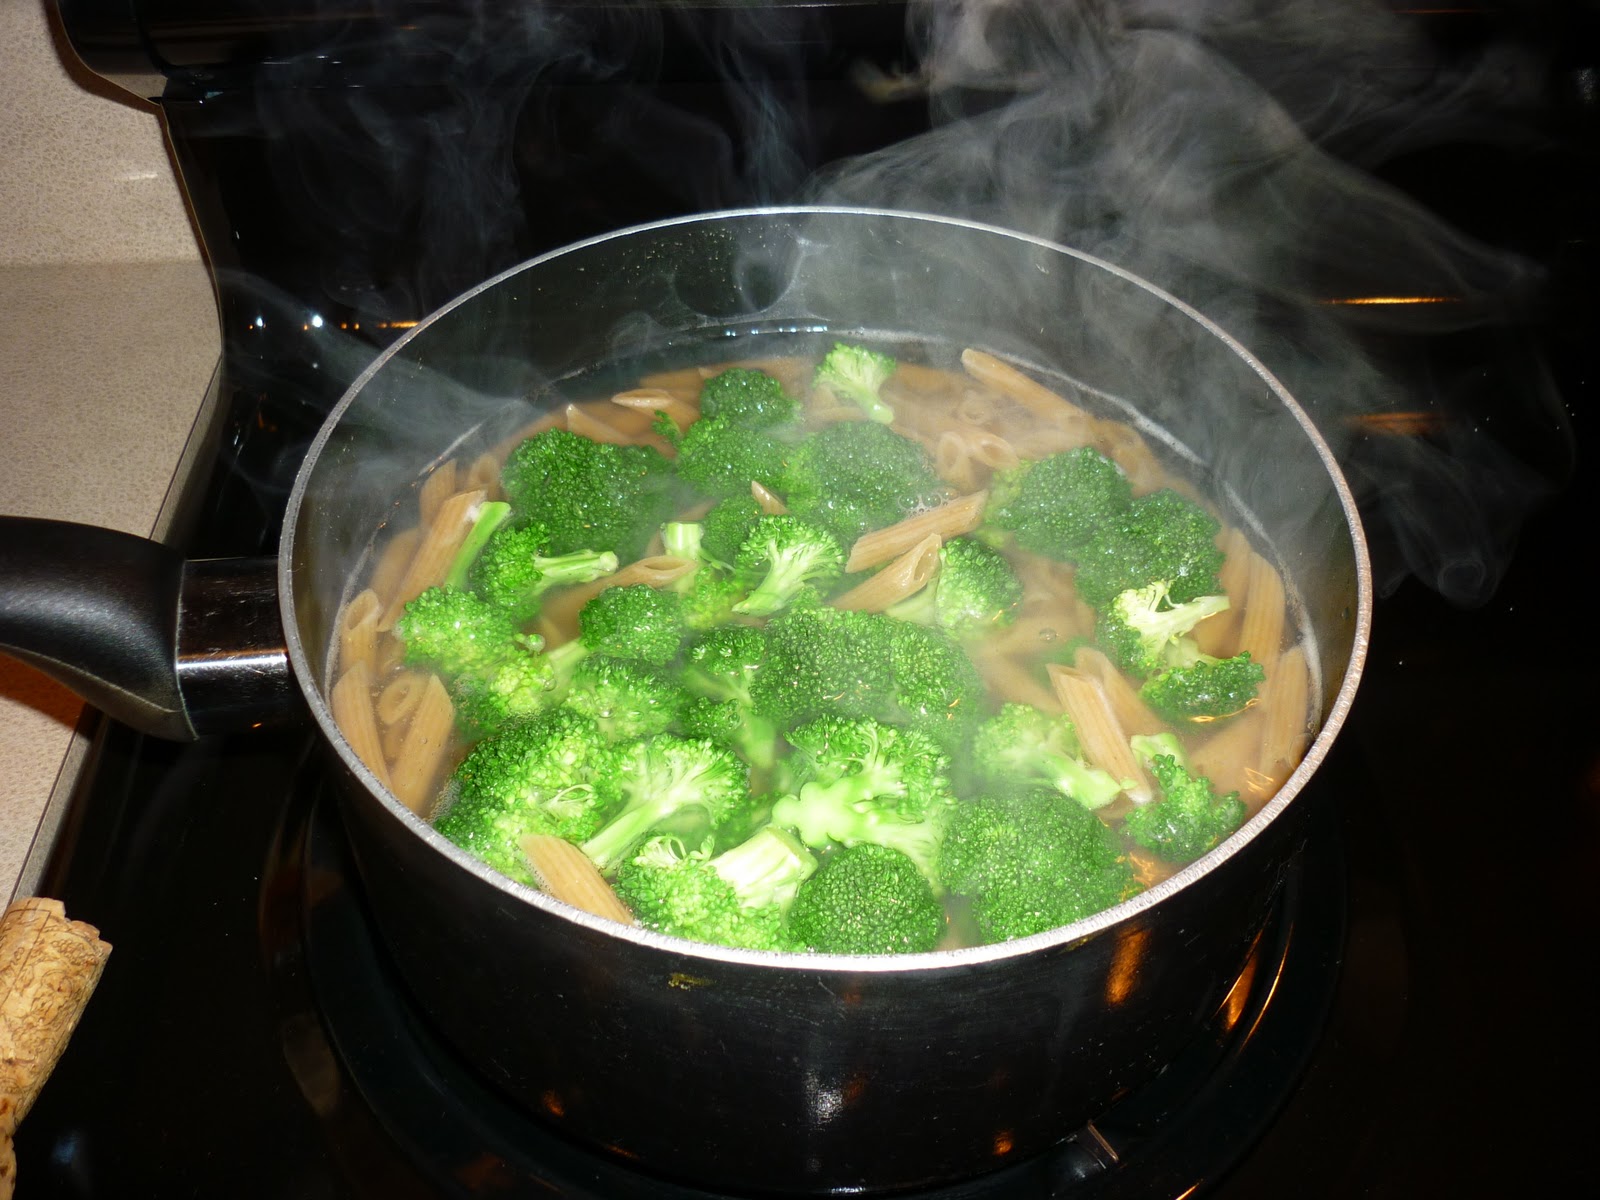
6 ounces uncooked whole wheat penne pasta
1 head broccoli, cut into bite-size florets
8 ounces mild Italian sausage, casings removed (turkey is optional)
1 medium onion, quartered and sliced
2 cloves garlic, minced
2 teaspoons grated lemon peel
1/4 teaspoon salt
1/8 teaspoon black pepper
1/3 cup grated Parmesan cheese

Direction:

  1. Cook pasta according to package directions, adding broccoli during last 5 to 6 minutes of cooking. Drain well; cover and keep warm.
  2. Meanwhile, heat large skillet over medium heat. Crumble sausage into skillet. Add onion; cook until sausage is brown, stirring to break up meat. Drain fat.
  3. Add garlic; cook and stir 1 minute. Add sausage mixture, lemon peel, salt and pepper to pasta; toss until blended. Sprinkle with cheese. 
No nutritional information available.

Sunday, December 11, 2011

Double Chocolate Fudge


Oh man this has to be one of the best desserts I have made! For Christmas I like giving homemade presents, mostly food, and I wanted to test out my ability to make fudge before I just gave them to people. Well, I was presently surprised at how delicious these little cubes of heaven were. They are soft, creamy, not too rich, and are just perfect! The recipe is simple and very easy to follow. You will get a lot out of it as well. There was so much that I had to take some into work to give away. There was no way I was going to keep 2.5 pounds of chocolate fudge sitting on my counter begging for me to eat it! My coworkers loved it. That is when I knew this would be my Christmas gift. I even had a coworker take some to her husband and he asked her to get the recipe from me. :) I love spreading the word on delicious goodies!

I hope everyone isn't too busy with decorating and family to take a few minutes out of your day to make this for the ones you love!


Double Chocolate Fudge
MomsWhoThink Fudge Recipes


Ingredients:
2 cups (12oz bag) semi-sweet chocolate chips
1 (11.5 oz) bag milk chocolate chips
1 (14 oz) can sweetened condensed milk
2 tablespoons heavy cream
2 teaspoon vanilla extract
1 cup chopped walnuts (optional)

Directions:
  1. In saucepan, over low-heat, melt semi-sweet chocolate chips with 2/3 cup sweetened condensed milk, 1 tablespoon cream and 1 teaspoon vanilla.
  2. Remove from heat; stir in 1/2 cup walnuts (if desired). Spread evenly into foil-lined 9-inch square pan.
  3. In another saucepan, over low heat, melt milk chocolate chips with remaining sweetened condensed milk, 1 tablespoon cream, and 1 teaspoon vanilla. Remove from heat; stir in remaining walnuts (if desired).
  4. Spread over fudge in pan. Chill 2 hours or until firm. Turn fudge onto cutting board; peel off foil and cut into squares. Store loosely covered at room temperature. 
Makes about 2.5 pounds
Nutritional info not available. 

Saturday, December 3, 2011

My first Thanksgiving as the Cook


I realized a few weeks ago that I have never unmasked myself to this blog, and I thought now would be a great time. Well here I am with my fist thanksgiving turkey! :) I know this is a little late to post about Thanksgiving but I completely forgot there were even pictures of my turkey in my camera till I went to post a new recipe the other day. This being my first turkey, I thought it would be fun to share!


Here is my first turkey all prepped and ready to roast. A couple weeks before Thanksgiving I was reading on how to prep, roast, carve...pretty much everything you do to prepare your turkey for dinner. I watched several videos on how to prep and season, but there was one that I found more to my liking. I know that many people like to put their stuffing in the bird and cook them that way, but I don't find that very sanitary. Plus, I don't really like stuffing too much. So, instead of stuffing it that way, I liked the idea of putting a bunch of herbs inside and underneath. Before stuffing it I seasoned the outside with pepper, salt and a little olive oil, and shoved a couple sage leaves underneath the skin. Along with handfuls of rosemary, thyme, and sage I also added a handful of chopped of onions inside to add to the flavor, and let me tell you, that bird had flavor! You could definitely taste the herbs. This is how I will do my turkey every year!


Here is the finished product! I did put it back in the oven for a little bit, but forgot to take a picture of the deliciousness.


Here a few other things I contributed too. I found a great recipe for these parmesan knots from Pillsbury. The best thing was that I didn't have to use yeast (which I am still a little afraid of). All I had to to was buy the "Golden Layers" tube and roll it into strings and tie them into knots. So easy, and really delicious. I was surprised how good they were with hardly any effort.

Below is my pumpkin cheesecake. My mom said she wanted the traditional pumpkin pie. I agreed, then mentioned cheesecake, she instantly changed her mind. So, I offered Pumpkin Cheesecake...we had a winner. Of course, I wasn't listening for the timer while it was baking so it sat in the oven for a little bit longer than asked and the top got a little brown. No problem when you pile on the whipped cream. I was able to take off the top layer and it was beautiful again. One of the many mistakes I can learn from this year. :)


I also made cranberry sauce (which I will post the recipe for later) and helped with the mashed potatoes. My mom's mashed potatoes are the best and I am determined to make them the same way. All in all, I think this holiday dinner went great, and I can't wait to make many more!


My husband is still across the country, so this year it was just me and my mom. Having just got married, I wanted to learn how to cook thanksgiving dinner so my mom gave me a few pointers on how she usually did things. It was a great learning experience, especially since next year we will be in a completely different country and won't be able to spend the holidays with family. I wanted to do things for myself this year, so next year I can make the holidays fantastic; even though we will be away from our loved ones. I am very confident that dinner will be even better next year. We can even start our own traditions with the holidays, which I look forward too! :)

Happy Holidays!

LinkWithin

Related Posts Plugin for WordPress, Blogger...